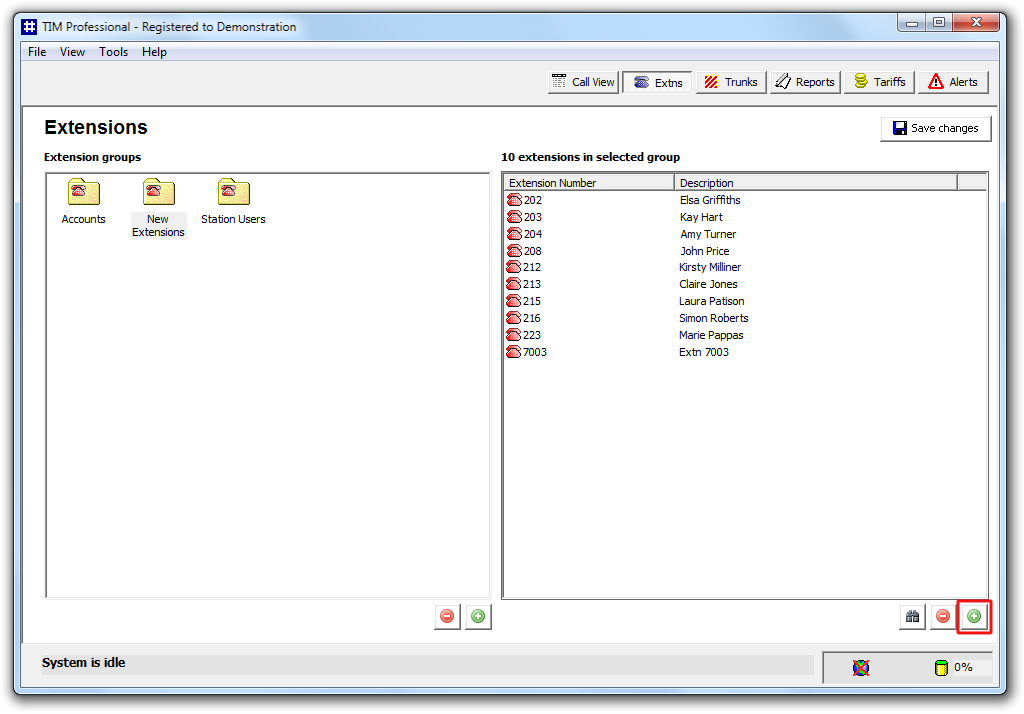
To add a new extension to the system, click on the  button at the bottom-right corner of the Extensions list panel, as shown below:
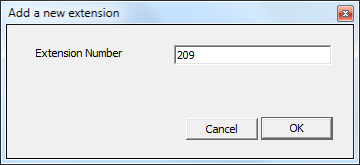
A new window will open. Enter the extension number and click on the button. If the extension number exists already in the system, you will be prompted in order to avoid creating duplications.
After clicking on the button, the Extension Properties window will appear, allowing you to configure the properties of the new extension.
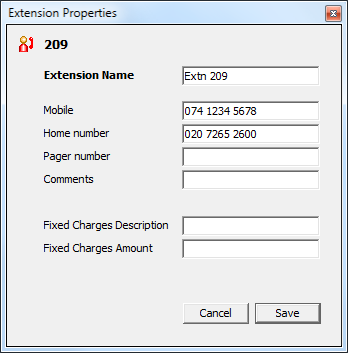
Enter the required details and click on the button to apply the changes.
| The properties added in this section will be displayed when using the directory via the web interface. |
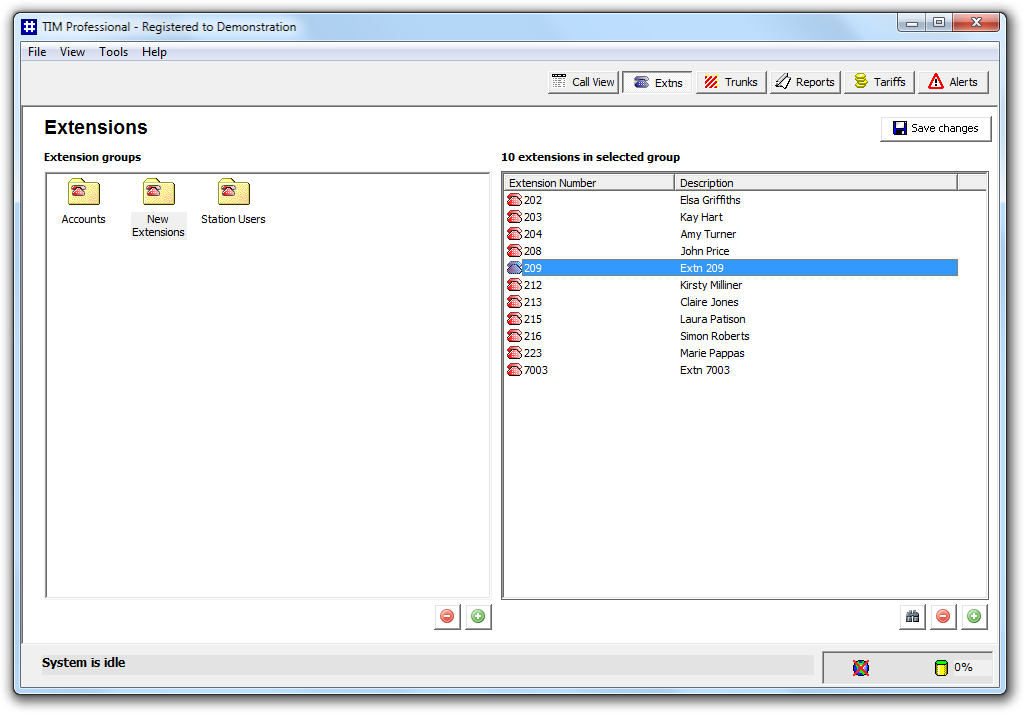
The new extensions you have added will be displayed in the Extensions list panel, as shown below:
When in the Extensions list (right-hand window) as shown here:

Click on the  button and the following prompt will appear:

Type your new extension number in the text box and press the button. If the extension you are trying to enter already exists, you will be told.
When you press the button to add the extension, the following popup will appear. This allows you to configure the properties for that extension.

Press when you have finished entering all data. Note that any properties added here will be displayed when using the directory via TIM's web interface.
The extension added can be found in the Extensions list, as shown below: