Scheduling reports
Preparing the report
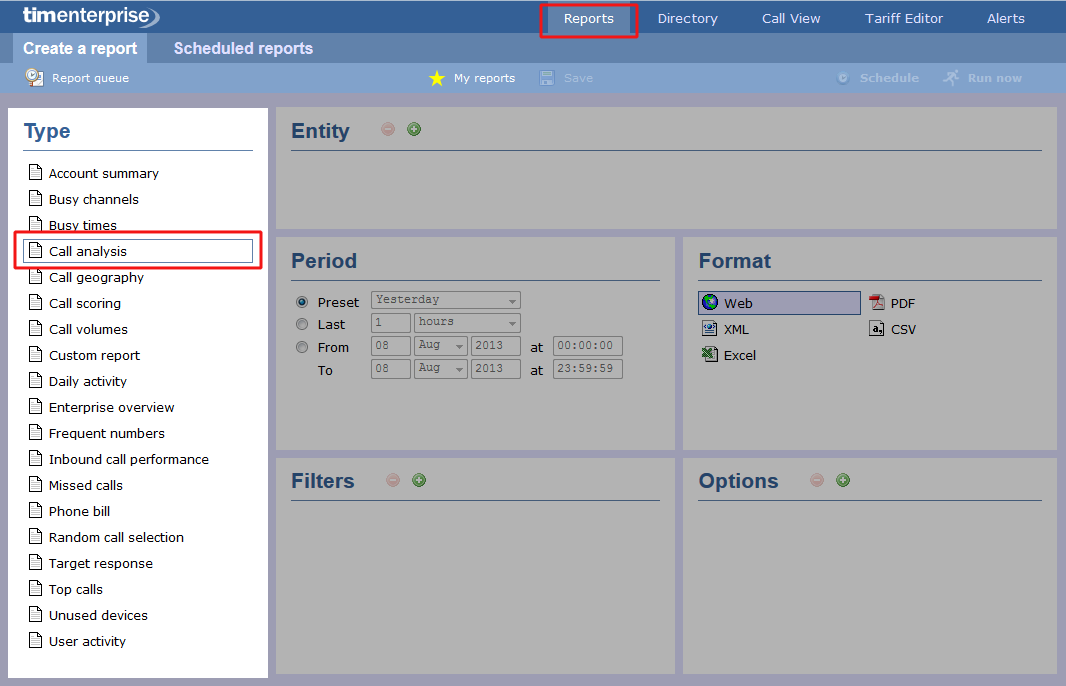
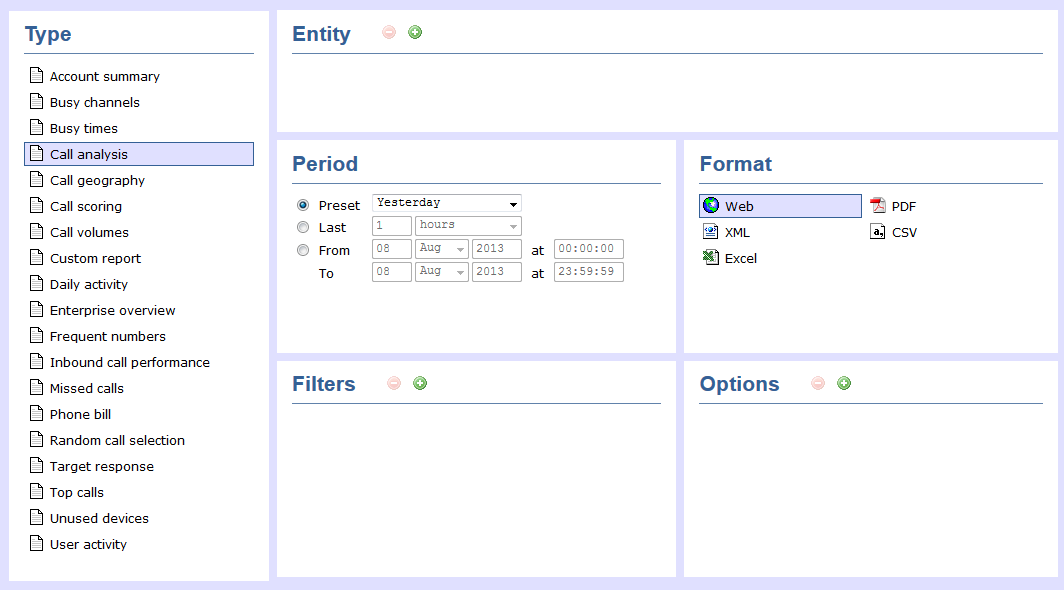
To schedule a report, click on the tab and select the report you want to run from the Type list on the left-hand side of the screen, as shown below:
In the same way as with running a report on demand, you can modify the report's entity, period, filters, options and format before scheduling, by referring to the relevant pages below:
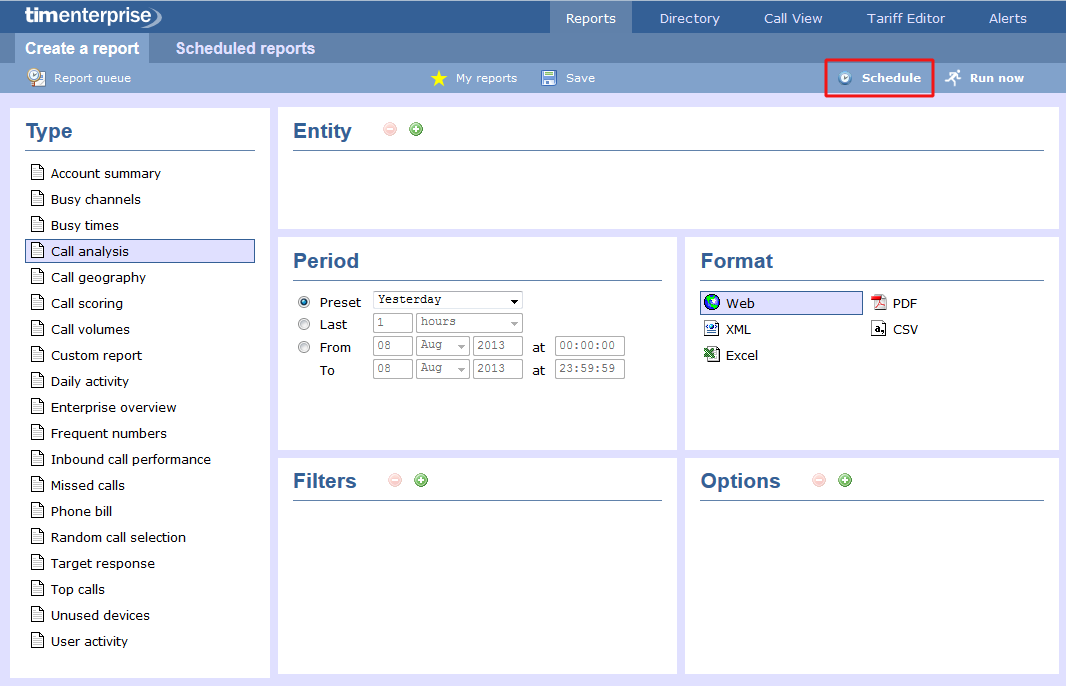
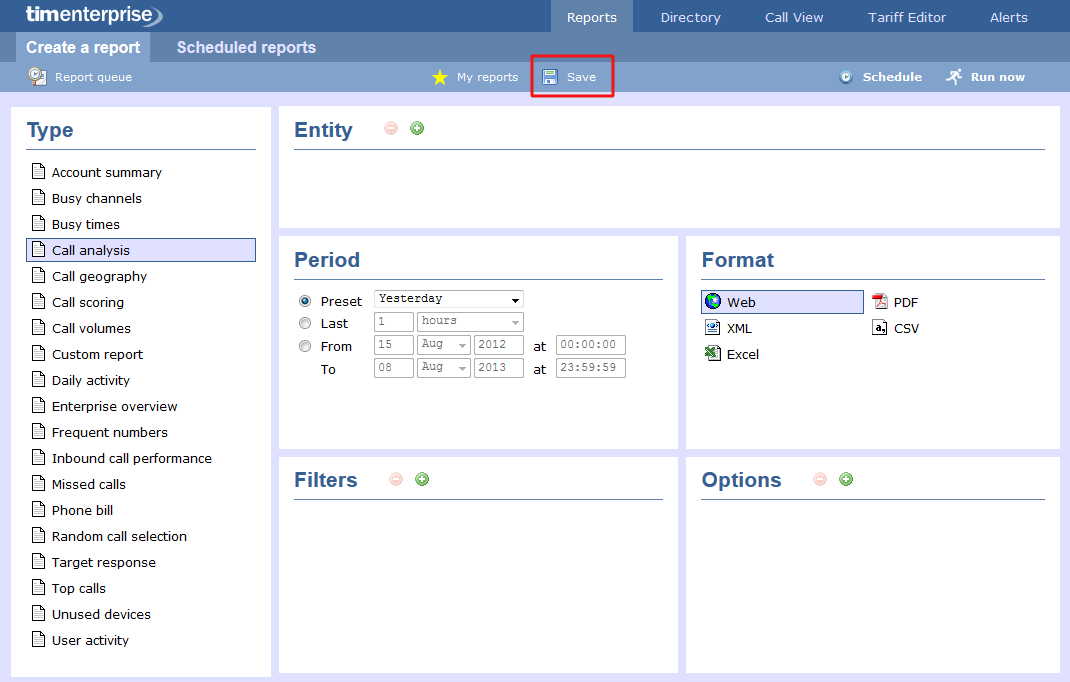
When you are ready to run the report, click on the button, as shown below:
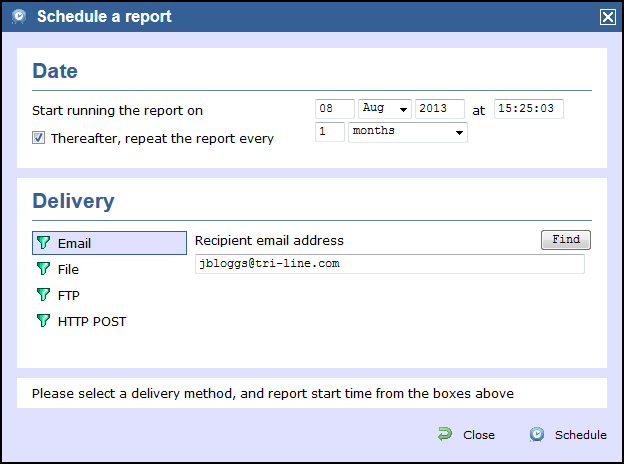
A new window will open, where you can set the scheduling parameters of the report:
- when you want the report to first run
- how frequently you want the report to run
- how you want the report delivered
- who should receive the report
Setting the scheduling parameters
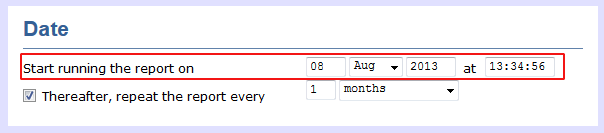
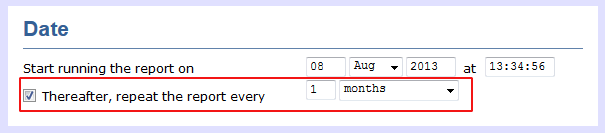
When do you want the first report to run?
Enter the future date and time that you want the report to run at, as shown below:
How often do you want the report to recur?
If you want the report to recur, tick the Thereafter, repeat the report box and select the frequency for reruns from the drop-down list, as shown below:
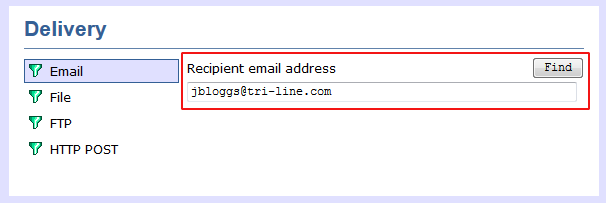
How do you want the report delivered?
The report can be delivered by e-mail or saved as a file to a specific location, by choosing a delivery method from the drop-down list:
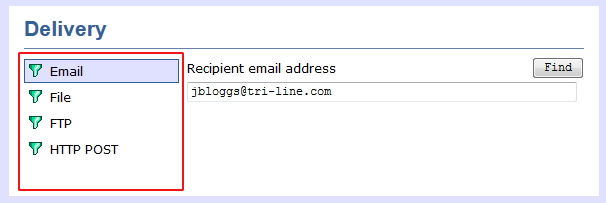
Who receives the report?
| Delivery method | Description | ||||||||||||||||
|---|---|---|---|---|---|---|---|---|---|---|---|---|---|---|---|---|---|
| |||||||||||||||||
File |
|
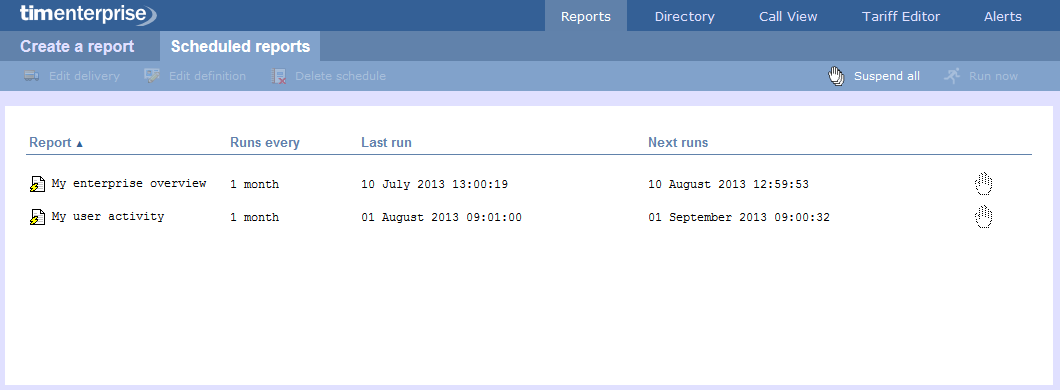
When you have configured the scheduling parameters, click on the button to save the report's definition. The newly-scheduled report will be added to the Scheduled reports list, as shown below:
The properties of a scheduled reports are web user specific, and can be seen or edited only by the web user that initially added the report in the system. |
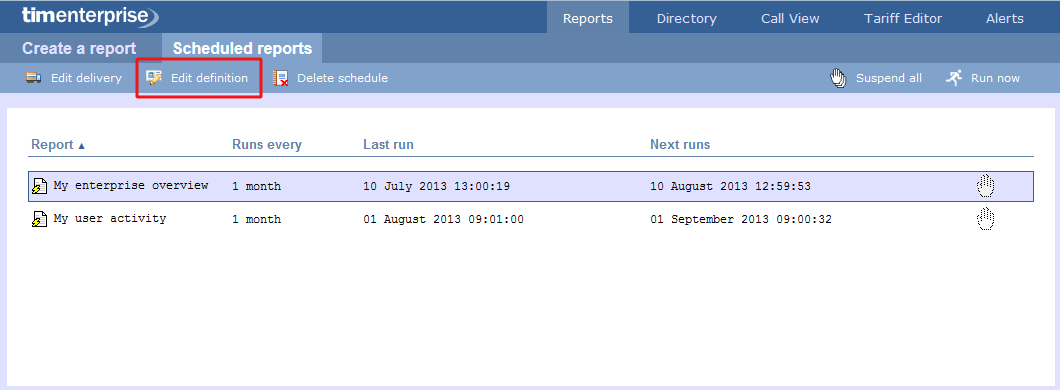
Editing the report's definition
To edit the report definitions, select it from the Scheduled reports list and click on the button, as shown below:
A new window with the properties of the report will open, where you can edit the entity, period, filters, options and format of the report.
Click on the links below for details of how to configure these parameters:
To apply any changes, click on the button, as shown below:
To schedule a report to run in the future, and to set it to recur at frequent intervals, select the desired report from the list and click on the button at the top-right of the Report screen, as shown below:

As with running a report on demand, you will need to select the report period and filters and options before scheduling.
When selecting the period for the report, remember that if you set the report to recur, this period will remain constant. For example, suppose you want a report to run every month, you would select the period as every 1 month, then set the report to run on the first day of the following month. This way, every month the report will run and have the period Last month, ensuring a retrospective view of the previous month.
The example below shows a Busy channels report. As no entity has been selected, it will run for the entire organisation. The report period has been set to Last month so ideally this report would be scheduled to recur monthly.

When you've entered your period and criteria, press the button. The report does not run, but instead a window appears which allows you determine the following:
- When you would like the report to start running
- How frequently the report runs
- How the report is delivered
- Who receives the report
The example below shows how the fields in this window may be filled in.

When do you want the first report to run?
Enter the exact date and time that you want the report to run in the Start running the report on fields. Enter the day, select the month from the drop-down list and enter the year. Then enter the time in the form 'hh:mm:ss' (hours, minutes and seconds).
How often do you want the report to recur?
If you want the report to recur, you can set the frequency by selecting from the drop-down list and entering a preceding digit e.g. 2 days, 1 week, 1 month etc.
How do you want the report delivered?
Choose the delivery method from the list and then choose the destination.
| Delivery method | Description |
|---|---|
| Enter the e-mail address in the Recipient e-mail address box. E-mail addresses that you have stored against users are available by clicking the button. You can also type an e-mail address that is not already stored. If you want to schedule delivery to more than one person, simply use a ';' or ',' to separate the e-mail addresses listed. | |
| File | Type the location and filename where you want the file to be saved. For example, enter C:\My Reports\My Call Analysis.html |
| FTP | Fill in the FTP options in the boxes displayed and select . |
| HTTP POST | Select HTTP POST as the Method of delivery and fill in the boxes. |
After entering the scheduling details, click on the button to return to the main Reports screen. Notice that your newly scheduled reports are now listed in the Scheduled Reports list. To access this list, simply click on the tab at the top left hand side of the screen as shown below:
