Scheduling reports
Preparing the report
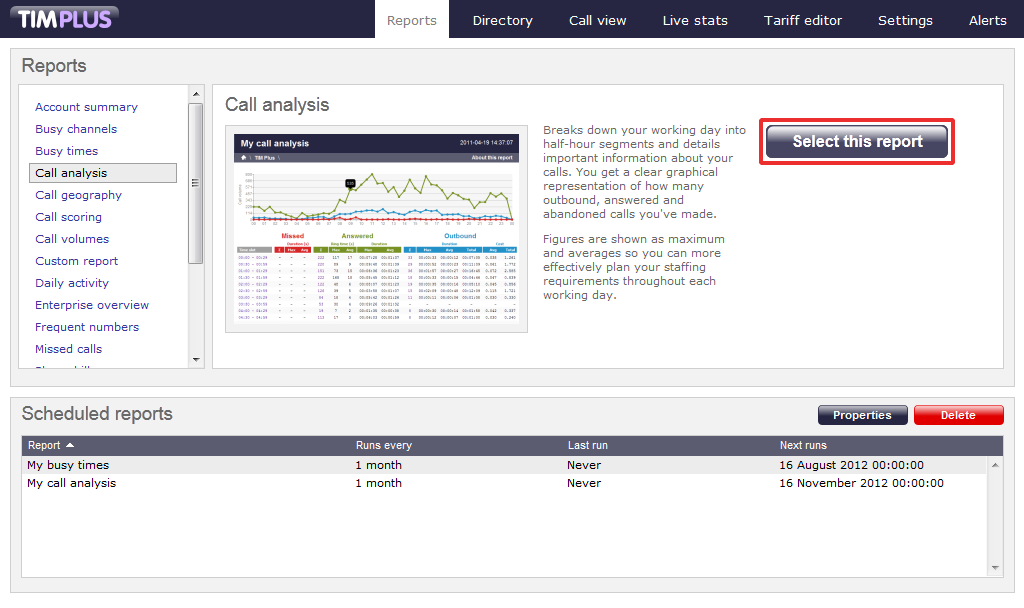
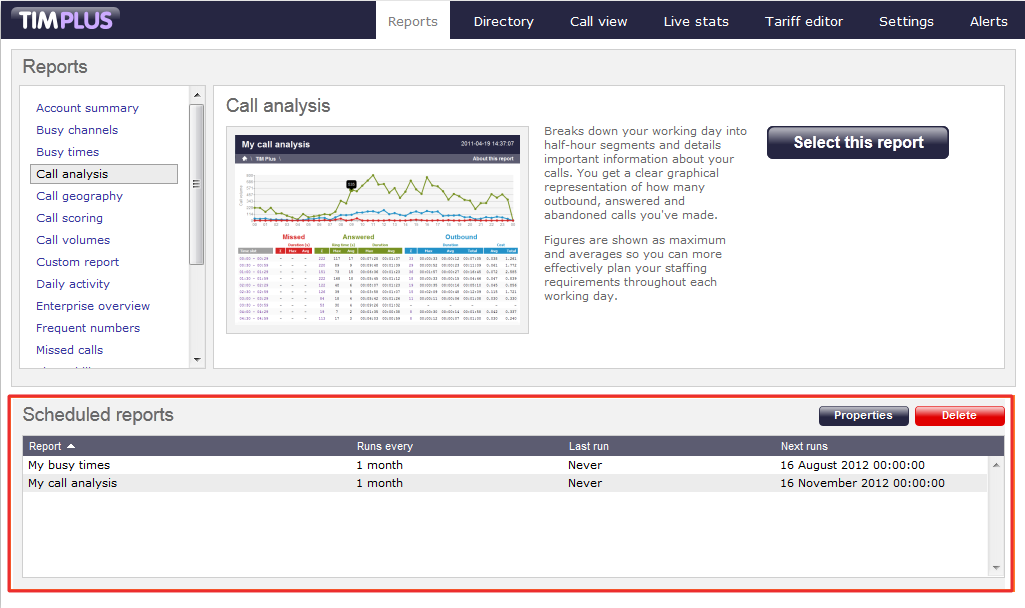
To schedule a report, choose the one you want to run from the list in the left-hand panel, then click on the button to start the report wizard, as shown below:
In the same way as with running a report on demand, you can modify the report period, entity, filters, options and format before scheduling, by referring to the relevant pages below:
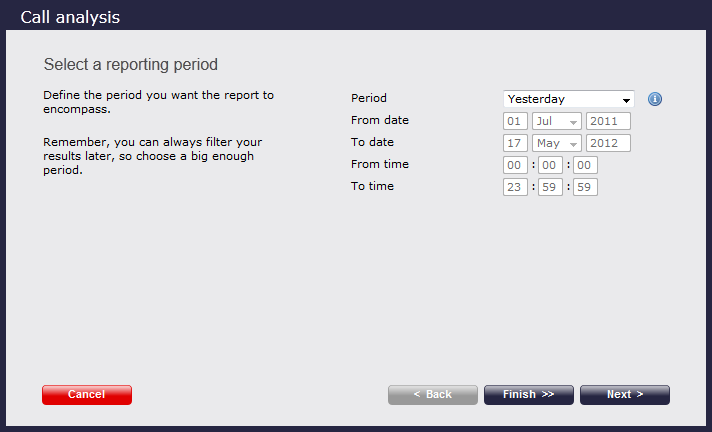
- Setting the report period
- Setting the report entity
- Setting the report filters
- Setting the report options
- Setting the report formats
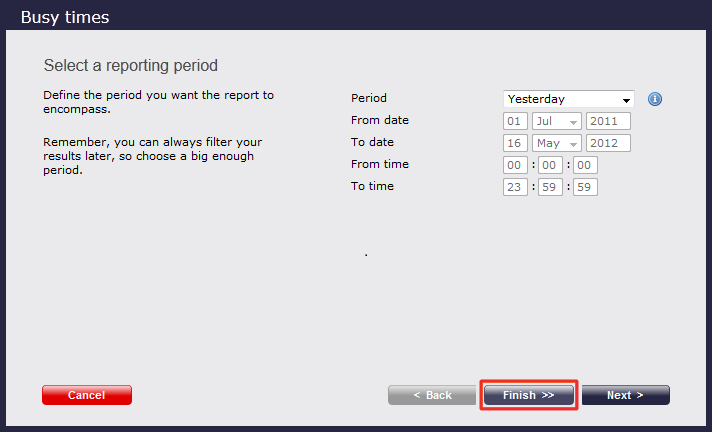
If you do not want to change any of the default settings, click on the button, as shown below:
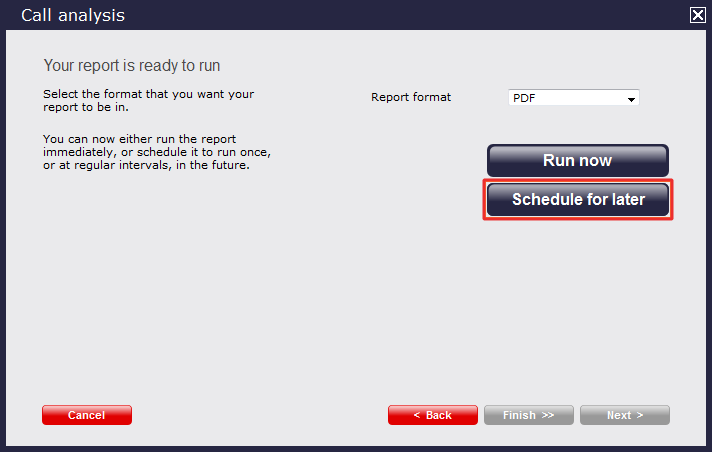
Once you have selected your report's parameters, click on the button.
In the new window that opens you can set the scheduling parameters of the report:
- when you want the report to first run
- how frequently you want the report to run
- how you want the report delivered
- who should receive the report
Setting the scheduling parameters
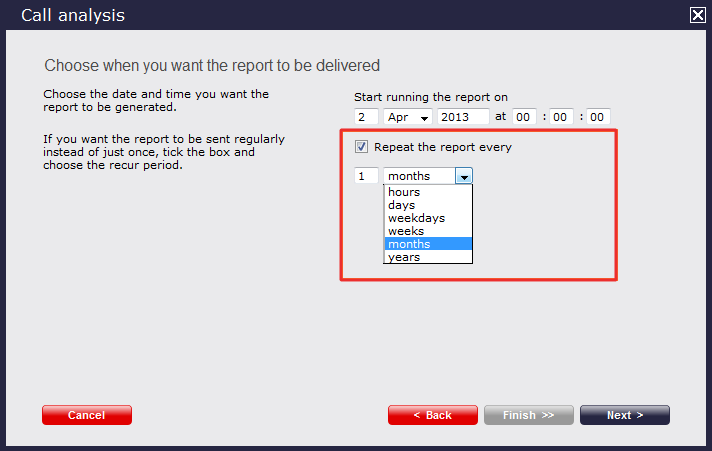
When do you want the first report to run?
Enter the future date and time that you want the report to run at, as shown below:
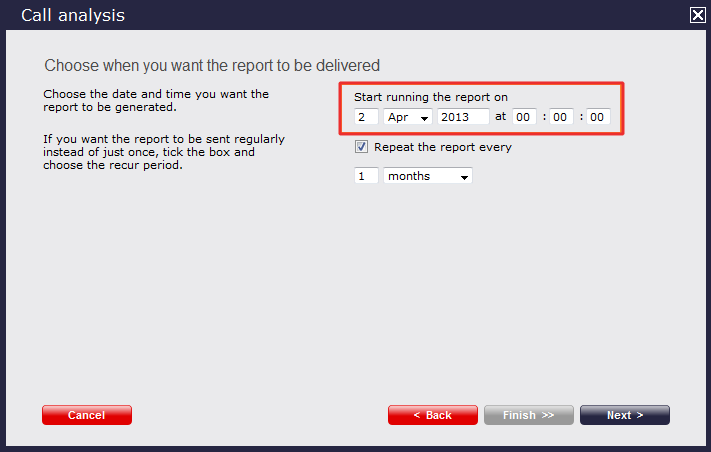
How often do you want the report to recur?
If you want the report to recur, tick the Repeat the report box and select the frequency for re-runs from the drop-down list, as shown below:
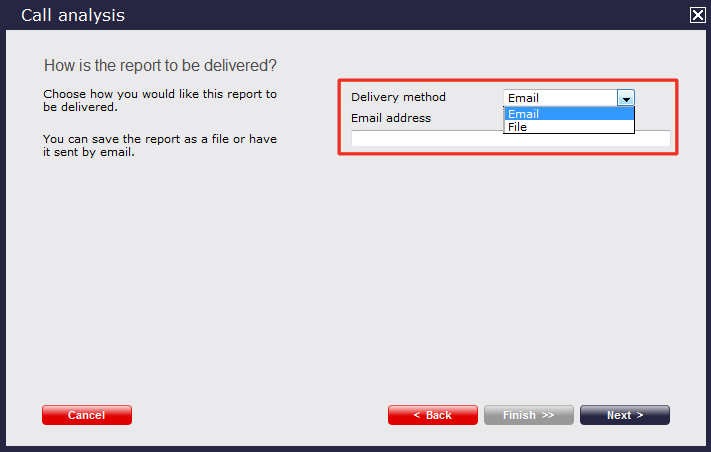
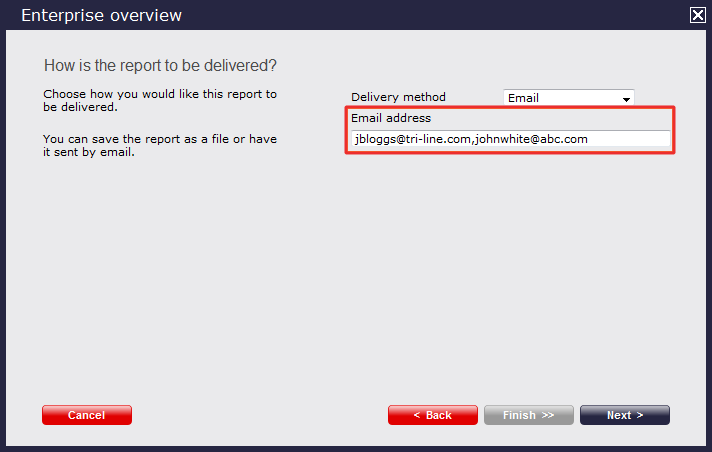
How do you want the report delivered?
The report can be delivered by e-mail or saved as a file to a specific location, by choosing a delivery method from the drop-down list:
Who receives the report?
| Delivery method | Description | ||||||||||||||||||||||||||
|---|---|---|---|---|---|---|---|---|---|---|---|---|---|---|---|---|---|---|---|---|---|---|---|---|---|---|---|
| |||||||||||||||||||||||||||
File |
|
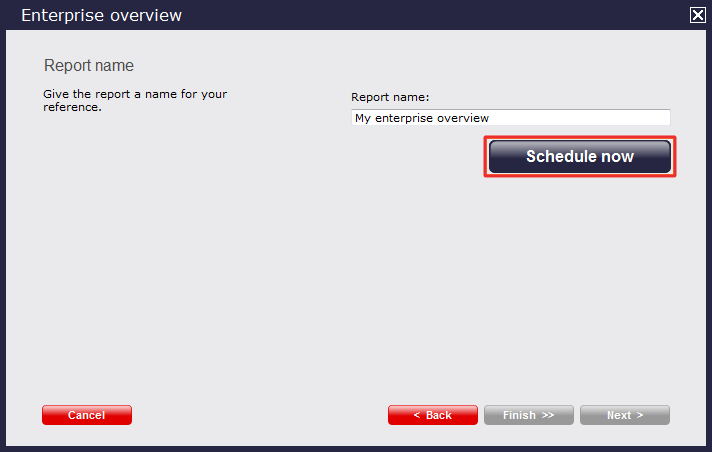
Schedule now
When you have configured all of the scheduling parameters, click on the button to save the report's definition.
Notice that your newly scheduled reports are now listed in the Scheduled reports panel at the bottom of the screen, as shown below:
Editing a scheduled report
To edit a scheduled report, select the report you want to configure from the Scheduled reports panel, and click on the button, as shown below:

A new window with the properties of the report will open, where you can edit the period, entity, filters, options and format of the report.
Click on the links below for details on how to configure these parameters:
- Setting the report period
- Setting the report entity
- Setting the report filters
- Setting the report options
- Setting the report formats
Deleting a scheduled report
To delete a scheduled report, select the report you want to delete from the Scheduled reports panel and click the button, as shown below:
