Overview
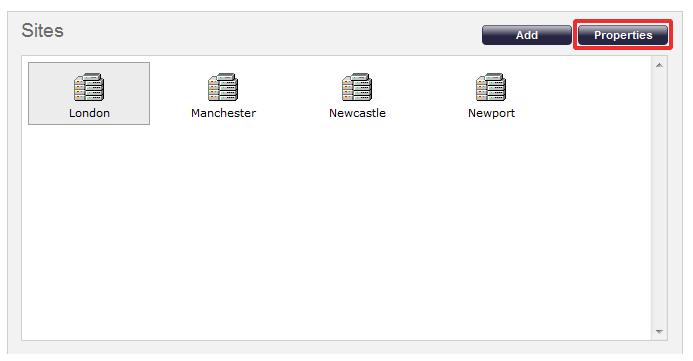
To configure a site, go to the Directory screen, select the site you wish to configure and click on the button at the top-right corner of the screen, as shown below:
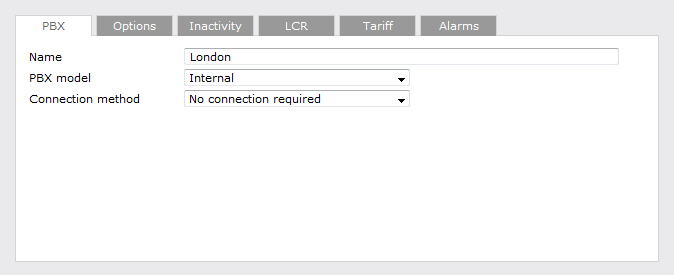
The following window will appear, where you can configure the properties of your site:

All the tabs in the Site properties window will be described below.
PBX
The properties displayed under the PBX tab will vary in accordance with the connection method supported by your telephone system. For detailed information about each particular PBX model, refer to the Connecting to your PBX section above.
For some telephone system you may need to download the PBX interface file from your Download area on the Gateway. |
Below you can find a description of all PBX properties, according to the connection method used:
All connection types
| Field | Description |
|---|---|
| Name | Type a name you want your site to be identified by |
| PBX model | Select your PBX model from the drop-down list |
| Connection method | Select the connection method supported by your telephone system from the drop-down list |
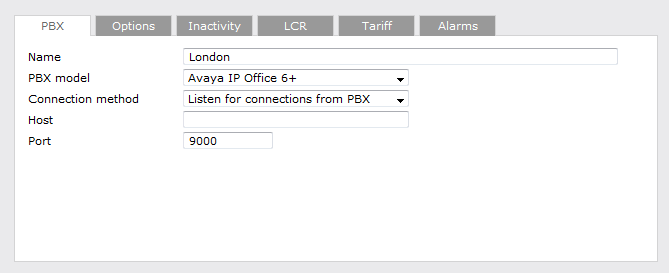
Listening Connection
| Field | Description |
|---|---|
| Host | Leave this field blank, although it can be configured to restrict incoming data from a specific IP address. |
| Port | Enter the port number used by the telephone system to send its CDR data. |
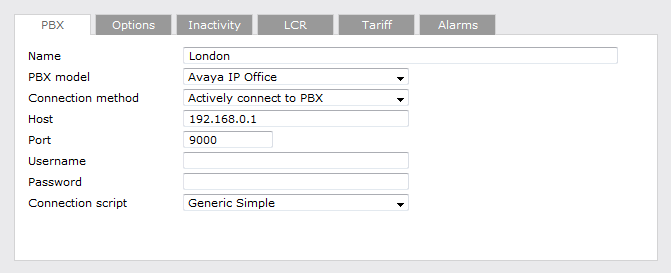
Active Connection
| Field | Description |
|---|---|
| Host | Type the IP address of the phone system that you are connecting to. |
| Port | Enter the port number used to transfer the CDR data. |
| Username | If your phone system requires authentication, enter the username here. |
| Password | If your phone system requires authentication, enter the password here. |
FTP Transfer
![]()
| Field | Description |
|---|---|
| Username | Enter the username created in the telephone system for the FTP transfer. |
| Password | Enter the password created in the telephone system for the FTP transfer. |
DSN Connection
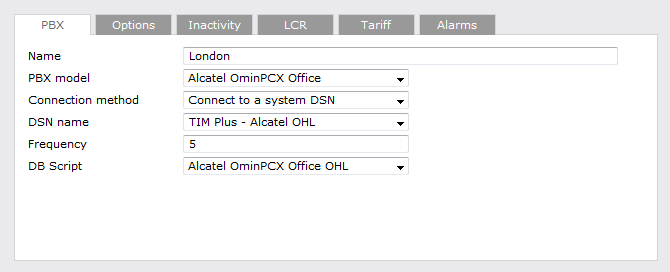
| Field | Description |
|---|---|
| DSN name | Enter the DSN name here. |
| Frequency | Enter the connection frequency, e.g. how often it polls the DSN connection. |
| DB Script | Enter the database script here. If you are not sure which DB script is required for your particular PBX, you can e-mail us at [email protected] and we can provide the correct file. |
Radius Connection
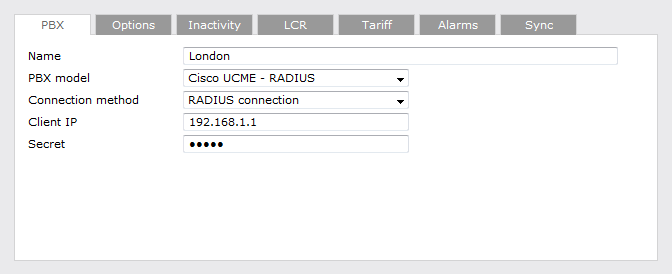
| Field | Description |
|---|---|
| Client IP | Enter the IP address of the device that sends the RADIUS events. |
| Secret | Enter the RADIUS authentication. |
SysLog Connection
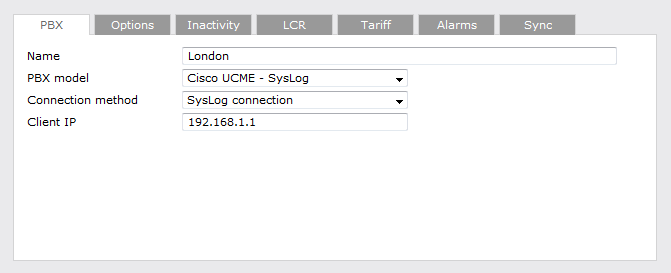
| Field | Description |
|---|---|
| Client IP | Enter the IP address of the device that sends the SysLog events. |
Options
The Options tab enables you to keep a local backup of data received, timestamp incoming call records and delay processing of call records. These options are explained below in more detail.
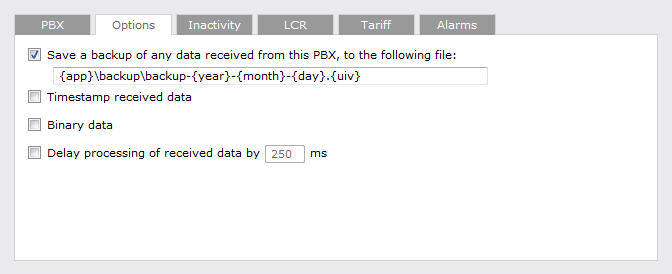
Save a backup of any data received from this PBX
By default, we save a backup of the data received from the telephone system in case this requires to be reprocessed at a later stage (e.g. your database becomes corrupt or someone accidentally deletes calls from the system).
To save a backup of the CDR data, type the location of the folder you want to store the files; by default, the following path is provided {app}\backup\backup-{year}-{month}-{day}.{uiv}. The {..} represent the system variables which are explained in more detail in the table below:
| Item | Description |
|---|---|
| app | The installation path for TIM Plus |
| year | The year the data was captured |
| month | The month the data was captured |
| day | The day the data was captured |
| uiv | The unique ID associated to each site |
Timestamp received data
Some telephone systems do not always output the date and time in the CDR data. This option allows you to timestamp the call logging data received from the phone system.
Binary data
This option is used only for telephone systems that send the CDR data in binary format (e.g. ISDX telephone system). When the Binary data option is ticked, we avoid adding a new line after each data batch we receive in order to prevent data corruption.
Delay processing of received data by { }ms
This option is used when the switch-network-PC connection is very slow and, in order to ensure that all data is received before processing, TIM Plus can be set to to wait x milliseconds before it attempts to process the data.
Inactivity
The Inactivity option allows you to set up an inactivity timer that notifies you when no data is being received in the call logger. You can decide the time interval you want the inactivity timer to be set up and also if you want to exclude specific hours or days of the week when you are not expecting any call activity (e.g. during the weekend).
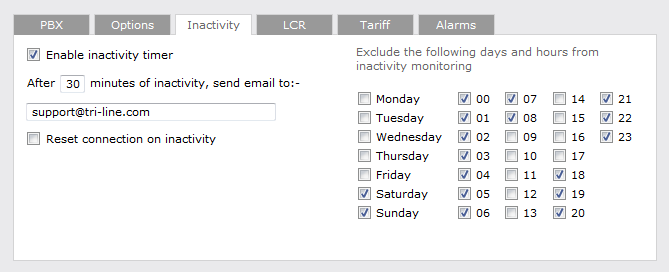
Enable inactivity timer
You can determine how long you want to wait for a call before activating the inactivity timer and who do you want to send the alert to, by entering the details in the boxes provided.
Reset connection on inactivity
If this box is ticked, the system will automatically reset the connection to the telephone system.
Exclude days and hours from inactivity monitoring
Tick the box alongside the days and hours when no call activity is expected (e.g. nights or weekends), so you don't receive an e-mail notification for those periods.
LCR
If you use LCR (Least Cost Routing) to route calls, add the codes in this section so TIM Plus can identity them.
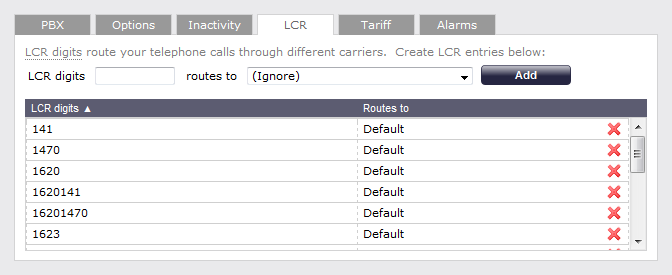
Adding LCR codes
To add an LCR code, enter the number in the LCR digits field and select the route it takes from the drop-down list, as shown above. There is no limit to the number of LCR routes that can be added.
Removing LCR codes
To remove an LCR code, click on the  icon alongside the code.
Tariff
Select the tariff table that you want to use from the list provided.

By default, TIM Plus is supplied with a standard BT tariff, which will automatically pick up national, international and mobile dial codes. Bespoke tariffs can also be provided on request.
Alarms
In order to monitor specific call events on the system, TIM Plus gives you the option to set up alarms that trigger when certain criteria are met, e.g. when calls above a certain duration are made, when specific numbers are dialled or when defined cost-thresholds are exceeded).
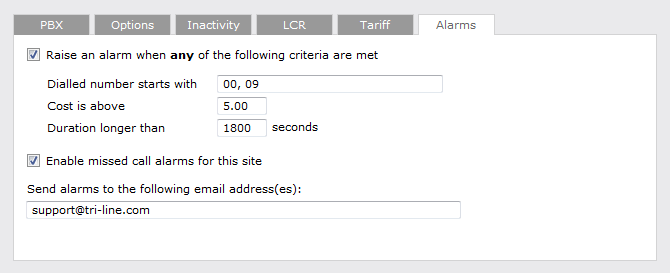
Dialled number alarm
Alarms can be set to activate when a part or full number is dialled. If you want to add a series of full or partial numbers, you can separate each entry with a comma, as shown above. Acceptable formats include: 00, 020, 020726526, 02072652600.
Cost alarm
An alarm can be set to activate when a call exceeds a pre-set cost. Please note that the cost will relate to the local currency, e.g. in the screenshot above, the 5.00 would be £5 in UK, €5 in Europe or US$5 in USA.
Duration alarm
An alarm can be activated when a call exceeds a predetermined duration, measured in seconds.
Missed call alarm
An alarm for missed calls can also be set up on the system, by ticking the box Enable missed call alarms for this site.
Delivering the alarm notification
To receive an alarm notification from TIM Plus, type the e-mail address of the person you would like to receive it in the text box provided, as shown above. To send the alarm to more than one e-mail address, separate each entry with a comma.