These instructions help you configure your Panasonic KX-TD Series phone system to work with TIM Enterprise. Please contact your system maintainer if you are not familiar with the configuration of your PBX.
Connection Type
Support Files
Required Tasks
Configuring your SMDR output
Follow the instructions below to configure your Panasonic KX-TD phone system to output SMDR data to TIM Enterprise. The configuration needs to be performed from a Digital Proprietary Telephone (DPT) such as the KX-T7431, KX-T7433, KX-T7436, KX-T7230, KX-T7235.
- Press the + + buttons simultaneously, then enter your system password.
- Enter programming mode 800 and press the button.
- Press the button to set the Outgoing option to All, then click on the button. Click .
- Press the button to set the Incoming option to All, then press the button.
- Press the button to complete the configuration.
Installing NetPBX
The Panasonic KX-TD Series phone system sends SMDR information via a serial connection. To collect the call logging data from the serial port and send it to TIM Enterprise, you first need to install the NetPBX software. For setup instructions, click on the link below:
Configuring TIM Enterprise
Once NetPBX is configured and collecting data, log in to TIM Enterprise and perform the following steps:
- Click on the tab.
- Locate the PBX object you want to configure in the Directory, right-click on it and select Properties.
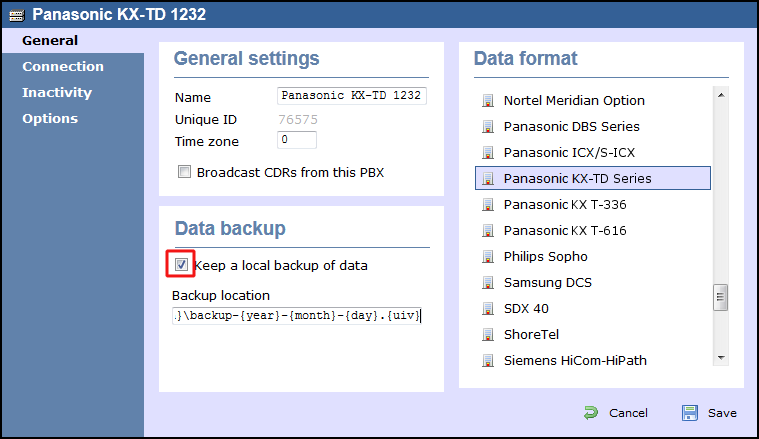
- A new window will open, displaying the general properties of your PBX object. Select Panasonic KX-TD Series from the Data format list and tick the Keep a local backup of data box, as shown below:
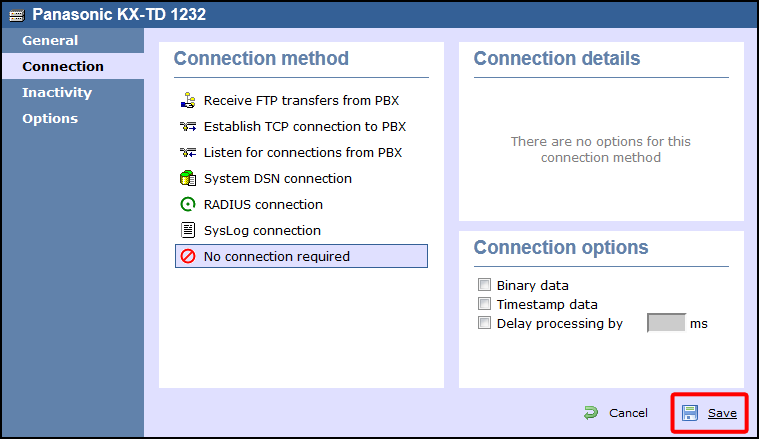
- Click on the tab and select No connection required from the Connection method list.
- Click on the button to apply the settings.