These instructions help you configure your Avaya BCM phone system (up to v3.x) to work with TIM Enterprise. Contact your system maintainer if you are not familiar with the configuration of your PBX.
Connection Type
Support Files
Required Tasks
Configuring your SMDR output
Follow the steps below to configure your Avaya BCM (up to v3.x) to output SMDR to TIM Enterprise:
- Open your Business Communications Manager Unified Manager.
- Click on the tree node.
- Click on the node.
- On the right-hand panel the Summary window will appear. Ensure that Up is selected in the Status drop-down list.
Select the tree node and configure the fields as shown below:
SMDR field Value Format Norstar Report Type All Language English Report Filter All Select the tree node and configure the fields as shown below:
SMDR field Value Date Format MM/DD/YY Header Format Line/Station DNIS Info Enabled Connection Char Leave as default Clip File Schedule Leave as default Clip File Size Leave as default CDR Disk Space Limit Leave as default - For the settings, please leave as the system defaults.
- For the setting please leave as the system defaults.
- Once you have completed the above changes, choose from the file menu.
Creating a CDR User
To enable TIM Enterprise to connect to your Avaya BCM you will need to create a CDR User in the option of your BCM Unified Manager configuration utility. The Avaya BCM connection requires the DCOM service to be enabled on the machine running TIM Enterprise. Following the introduction of enhanced security in Windows XP Service Pack 2, the username and password for the CDR User now need to be exactly the same as the credentials of the Windows account under which TIM Enterprise runs.
Installing and configuring NetPBX
To collect the call logging data from the Avaya BCM up to v3.x phone system and send it to TIM Enterprise, you first need to install the NetPBX software.
After the installation, follow the instructions below to set up a connection between BCM and NetPBX:
- Make sure the CDRServer.EXE and Interop.CDRSERVERLib.dll files are placed in the same folder as NetPBX.EXE, usually located in {pf}\Tri-Line\NetPBX.
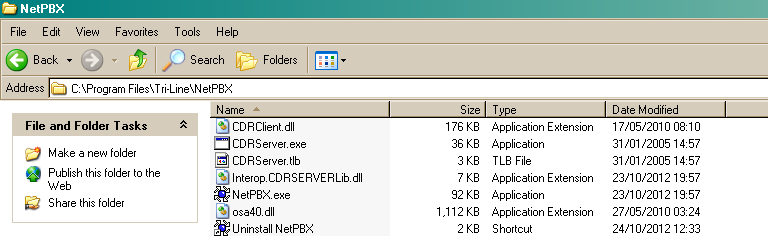
- Register CDRServer.EXE by running the command line with administrator privileges and typing the following command under the directory path of the NetPBX folder: CDRServer.EXE/regserver.
- Open the computer's local security policies: Start -> Control Panel -> Administrative Tools -> Local Security Policy.
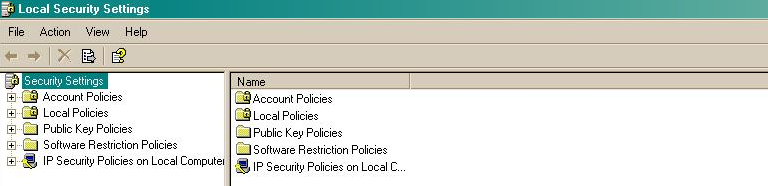
- Within the Security Settings\Local Policies\Security Options tree, change the following items as highlighted in the screenshot below:

- Network Access: Let Everyone permissions apply to anonymous users. Set this to Enabled.
- Network Access: Sharing security model for local accounts. Set this to Classic.
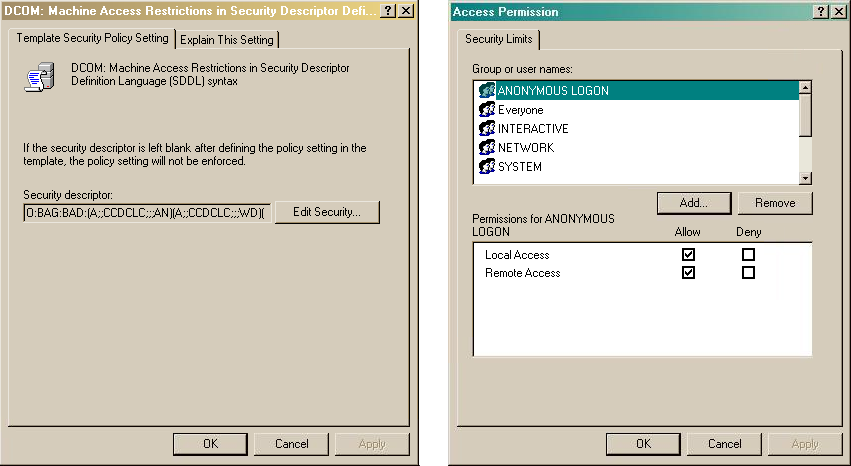
- DCOM: Machine Access Restrictions: Click on and add the following user accounts: Anonymous, Everyone, Interactive, Network, System. Set each one to have full access rights.
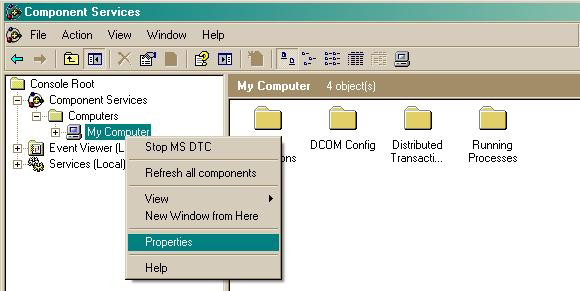
- Next step is to modify the way DCOM behaves on the computer by executing the DCOM configuration program: Start -> Run -> DCOMCNFG [enter]. Browse the tree to the following location: Console Root -> Component Services -> Computers -> My Computer. Right-click on My Computer for and amend or update the following options:
- On the tab:
Enable Distributed COM on this computer: tick the box for his option
Default Authentication Level: set this to Connect
Default Impersonation Level: set this to Identify
- On the tab:
Go to the Access Permissions section and select .
Add the following accounts and set both local and remote access permissions: Anonymous, Everyone, Interactive, Network, Local Service and System.
Go to the Launch and Activation Permissions section and click on tab.
Add or update the following accounts to give them all local and remote access permissions: Anonymous, Everyone, Interactive, Network, Local Service and System.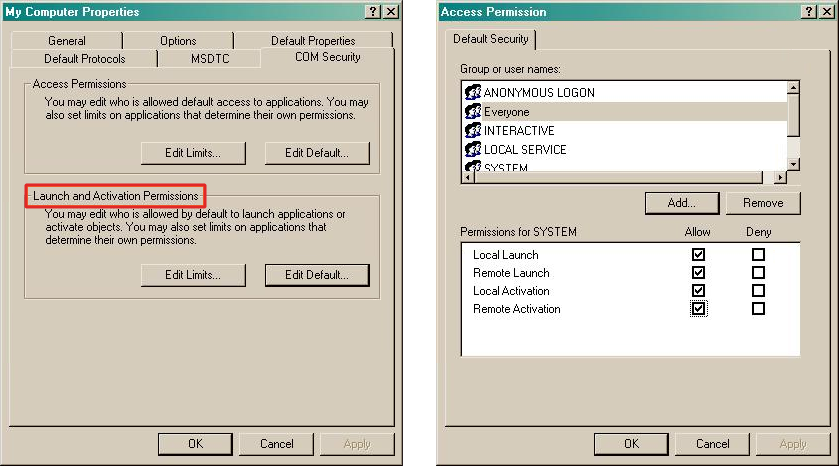
- On the tab:
Configuring TIM Enterprise
Follow the steps below to configure TIM Enterprise to collect the SMDR data from your Avaya BCM:
- Click on the tab.
- Locate the PBX object you want to configure in the Directory, right-click on it and select Properties.
- A new window will open, displaying the general properties of the PBX object. Select Avaya BCM from the Data format list and tick the Keep a local backup of data box, as shown below:
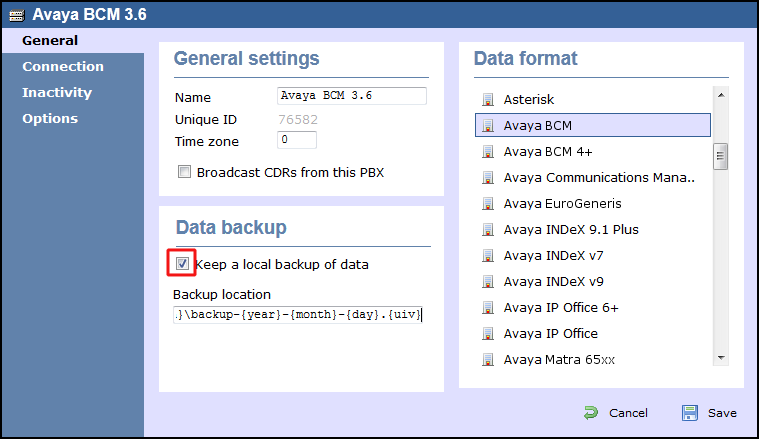
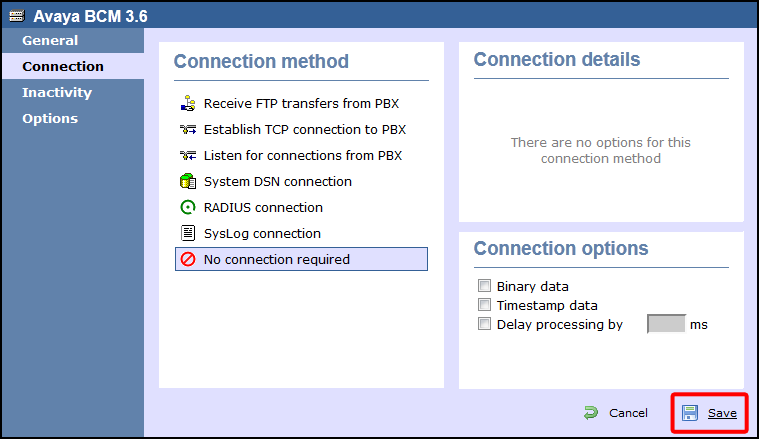
- Click on the tab and select No connection required from the Connection method list.
- Click on the button to apply the settings.