These instructions help you configure your Avaya Aura Communications Manager phone system to work with TIM Enterprise.
NB Please contact your system maintainer if you are not familiar with the configuration of your PBX.
Connection Type
Support Files
Required Tasks
Configuring your SMDR output
Connect to your Avaya Aura Communications Manager using an RS232 or IP terminal client and, after logging in with your administrative credentials, follow the steps below:
Configuring node-names ip
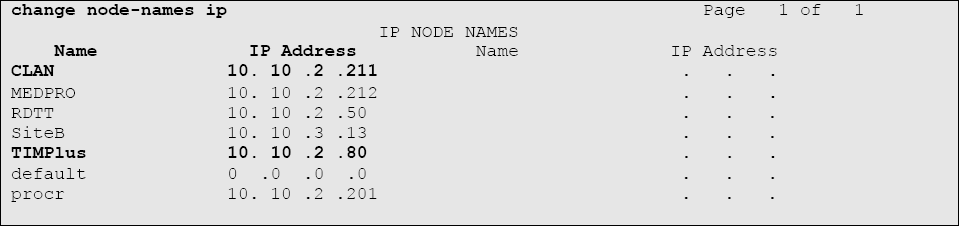
Issue the change node-names command to add a new node. Two fields need to be specified as follows:
- Name: TIMEnterprise.
- IP Address: (the IP address of the machine running TIM Enterprise)
Here is an example of a node-names configuration:
Configuring ip-services
Issue the change ip-services command to add or amend IP services. There are three pages to configure:
On Page 1, the following fields are required:
- Service type: CDR1
- Local Node: (set this to the node-name of the CLAN board)
- Local Port: 0 (this cannot be changed)
- Remote Node: TIMEnterprise (the same node-name as created in the node-names section above)
- Remote Port: (the TCP port that TIM Enterprise will use to listen for CDR data, e.g. 9000)
Here is an example of an ip-services configuration (page 1):

On Page 2 no configuration changes are needed.
On Page 3 the following fields are required:
- Reliable Protocol: n
- Packets Resp Timer: 30 (default value)
- Sessions Connect Message Cntr: 3 (default value)
- SPDU Cntr: 3 (default value)
- Connectivity Timer: 60 (default value)
Here is an example of an ip-services configuration (page 3):

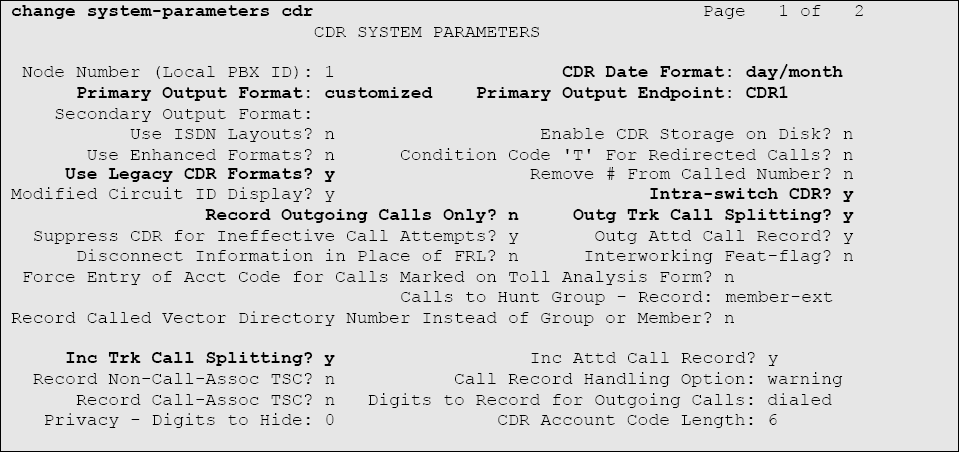
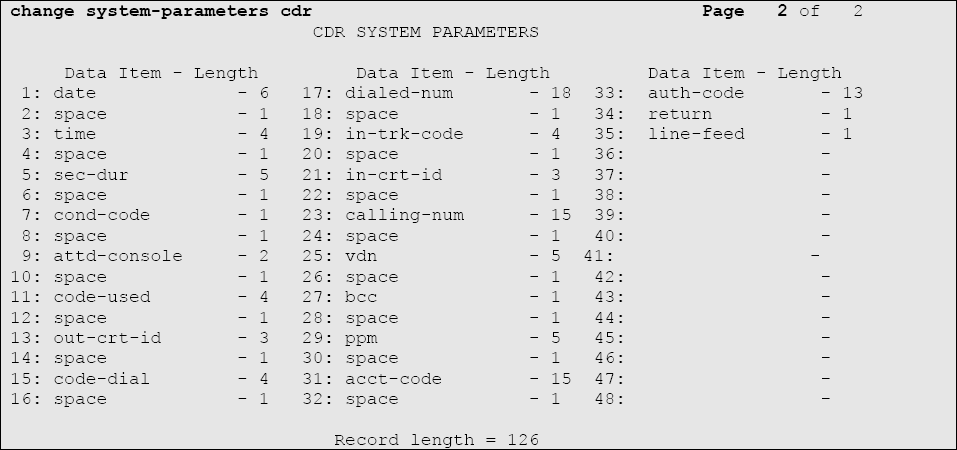
Configuring system-parameters cdr
Use the change system-parameters cdr command to amend the CDR format. The following screenshots describe how the settings should appear on your system:
Page 1
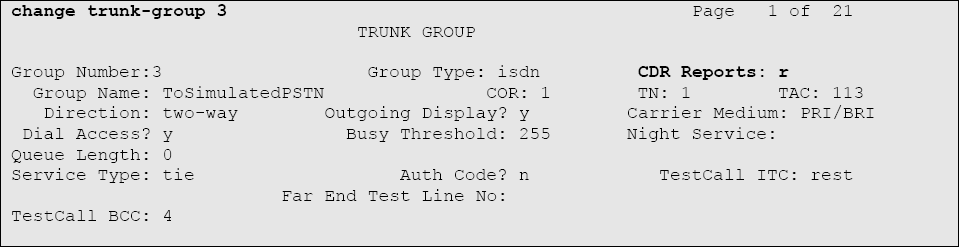
Configuring trunk-group
To ensure that response times for incoming calls are included in your CDR data, the CDR field for each trunk group must be set to r. This must be applied to all trunk groups using the following command:
change trunk-group X (where X is the trunk group number)
An example trunk-groups configuration screen is shown below:
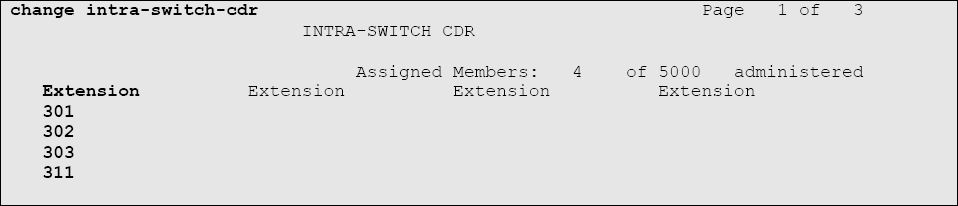
Configuring intra-switch-cdr
To have internal calls included in your CDRs, ensure that the intra-switch-cdr table is populated with the extension numbers you are interested in. To modify the table, issue the following command:
change intra-switch-cdr
Here is an example of an intra-switch-cdr configuration table:
Configuring multiple Avaya Aura Communications Manager systems
If you have more than one Avaya Aura Communications Manager, configuration of your CDR depends on which of the following scenarios you have implemented:
LSPs (Local Survivable Processors)
If your Avaya Aura Communications Manager systems are connected and the remote sites are LSPs then you need only configure the Master/Primary Avaya Communications Manager. When TIM Enterprise receives the CDR information, it will include CDRs from all of the remote LSPs.Not linked
If you have multiple Avaya Aura Communications Manager systems where LSPs aren't in use, you need to configure each Avaya Communications Manager separately. You must ensure that each Avaya Aura Communications Manager has its own unique Remote Port (IP-services) setup.
Configuring TIM Enterprise
Follow the steps below to configure TIM Enterprise to listen for SMDR data from your Avaya Aura Communications Manager:
- Click on the tab.
- Locate the PBX object you want to configure in the Directory, right-click on it and select Properties.
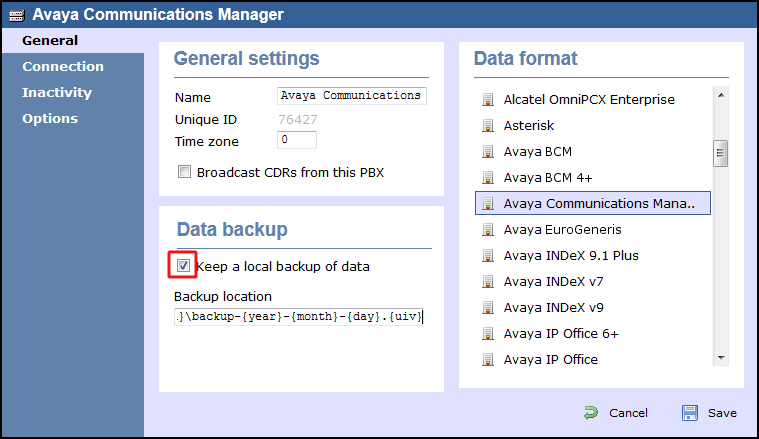
- A new window will open, displaying the general properties of your PBX object. Select Avaya Communications Manager from the Data format list and tick the Keep a local backup of data box, as shown below:
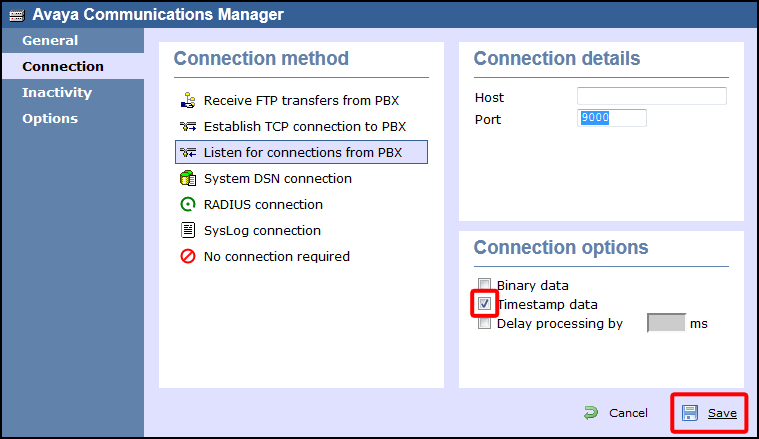
- Click on the tab and select Listen for connections from PBX from the Connection method list.
- Leave the Host field blank.
- In the Port field, enter the Remote Port (ip-services) that you configured above.
- In the Connection options, enable the Timestamp data field.
- Click on the button to apply the settings.