| Asterisk is, in fact, a communications toolkit. Not a ready-to-go PBX. It has a lot of functionality that someone needs to craft into something. That something most often happens to be a PBX, but it doesn’t have to be a PBX. It can be contact center software, an automated call distributor, a voicemail system, a video mail system, an IP-PBX, or so much more. Someone could even add their own IoT hooks to it to turn it into some other kind of communication system. (For full details, see https://www.sangoma.com/products/open-source/). |
|---|
These instructions help you configure your Asterisk phone system to work with TIM Enterprise. Contact your system maintainer if you are not familiar with or need assistance with the configuration of your PBX.
Connection Type
Support Files
Required Tasks
Configuring your SMDR output
Follow the steps below to enable the SMDR output on your Asterisk phone system:
- Enter the Server Setup System.
- Under the section, edit the manager_custom.conf file.
Add the following lines to the file:
- Verify and save the changes.
Configuring TIM Enterprise
Follow the steps below to configure TIM Enterprise to collect the SMDR data from your Asterisk phone system:
- Click on the tab.
- Locate the PBX object you want to configure in the Directory, right-click on it and select Properties.
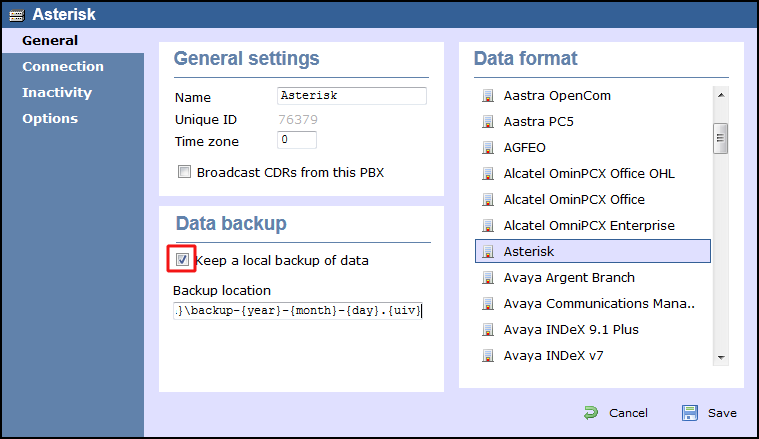
- A new window will open, displaying the general properties of your PBX object. Select Asterisk from the Data format list and tick the Keep a local backup of data box, as shown below:
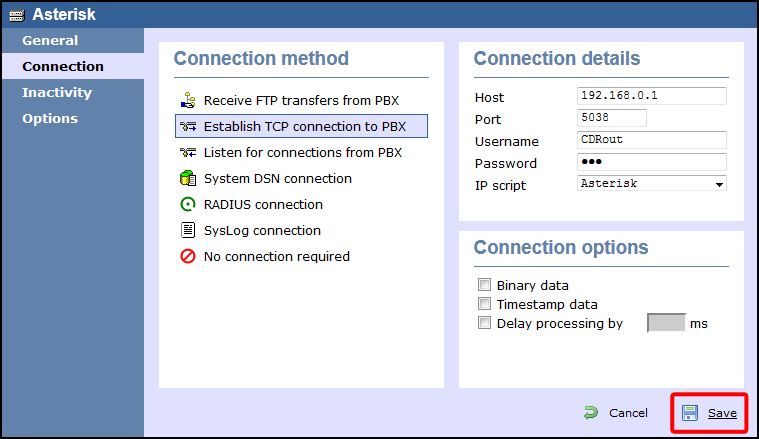
- Click on the tab and select Establish TCP connection to PBX from the Connection method list.
- In the Host field, enter the IP address of your Asterisk phone system.
- In the Port field, enter 5038.
- In the Username and Password fields, enter your username and password accordingly.
- In the IP script field, select Asterisk from the drop-down list.
- Click on the button to apply the changes.
Labels: