These instructions describe how to connect your TIM Enterprise system to a Microsoft Teams account, allowing you to analyse your Teams calls in the same way as standard phone calls.
| Pbxsummary | ||||||||||
|---|---|---|---|---|---|---|---|---|---|---|
|
Add a new data source
Connecting TIM Enterprise to your Microsoft Teams account is very similar to the way you connect to any other PBX or communications service:-
- Select the
tab and navigate to the part of the directory where you want to store the new data source.Buttonmacro Label Directory - Press the
button at the top of the directory list.Buttonmacro Label New object - In the
Add new objectwindow that appears, selectPBXfrom the Other object list, then enter a name for the data source - such as "Microsoft Teams" - at the bottom of the window.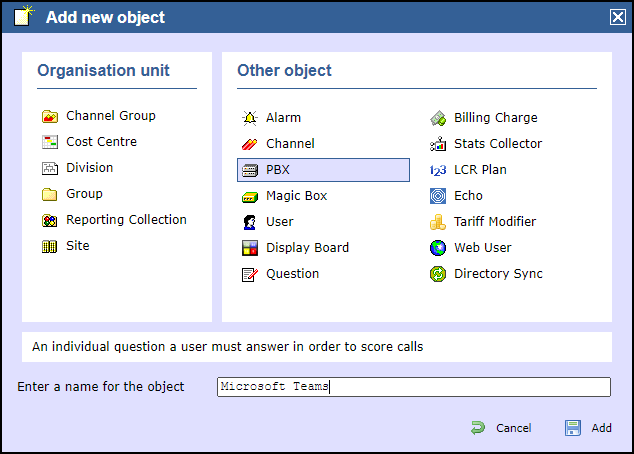
- Click the
button.Buttonmacro Label Add
Configure the new data source
Click on the newly-added data source object in the directory list, then choose Properties from the pop-up menu in order to configure the data source:-
- On the General tab, choose
Microsoft Teamsin the Data format list on the right.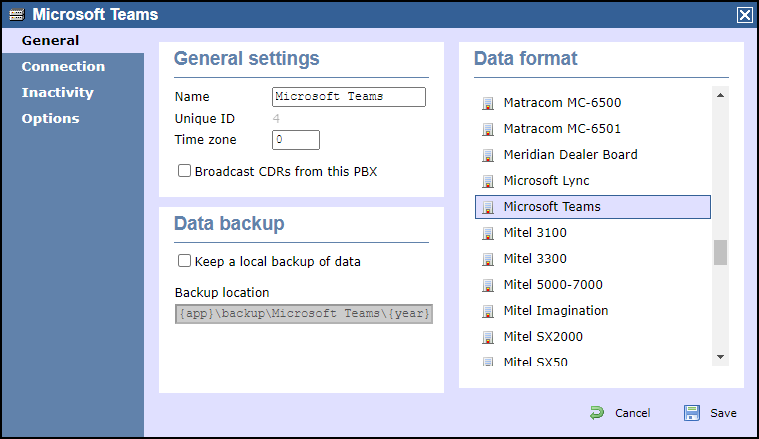
- On the Connection tab, choose
OpenCDRas the connection method in the left-hand panel.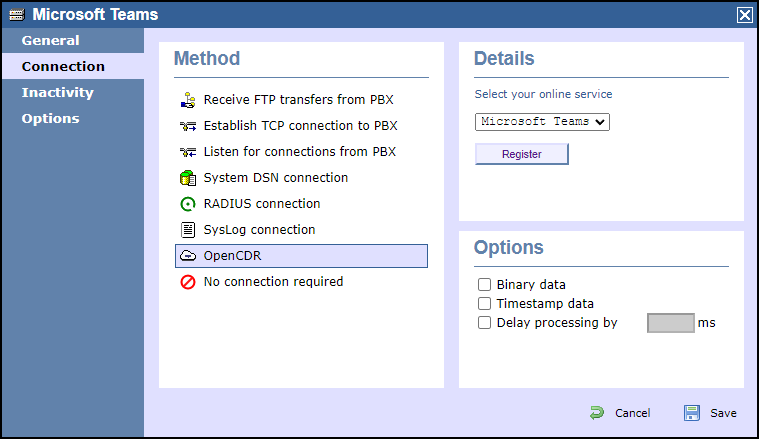
- In the Details panel on the right-hand side, choose
Microsoft Teamsfrom the drop-down list of online services, then click
.Buttonmacro Label Register - Click on the Sign in with Microsoft button
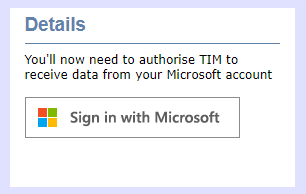
- You'll be redirected to Microsoft's authentication system and asked to grant permission for the TIM application to access your call records. Please ensure the Microsoft account you use has the rights to grant the required permissions.

- When authentication is complete, you'll be redirected back to the TIM Enterprise directory, specifically to the newly-authorised data source.
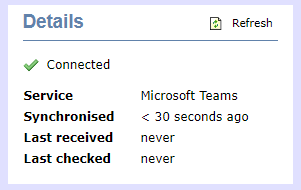
- If the authorisation was accepted, you should see a Connected status in the Details panel
- Press the
button to save your new data source.Buttonmacro Label Save
Automatic directory synchronisation
TIM Enterprise will automatically synchronise its directory with your Microsoft Azure directory every day to ensure that all of your Teams users' details are propagated to the TIM Enterprise directory.
TIM Enterprise is limited to read-only access to your Microsoft Teams users, so changing a user's details in TIM Enterprise will not change the user in Microsoft Teams.
Because the access is read-only, you can group Teams users into different groups within TIM Enterprise without affecting group membership in your Teams account, which can be useful for comparisons across your Teams groups.
Full integration
As with any other data source - such as a PBX - all of your Teams calls and meetings are fully integrated into the TIM Enterprise platform, including in reports and live display boards.
Call types
Available call types include inbound calls, outbound calls, internal calls, conference calls and missed calls.
Calls into your Teams account from outside Teams, such as PSTN (Microsoft Calling Plans) and Direct Routed (SIP) calls are also fully captured by TIM Enterprise.
TIM Enterprise captures calls from Teams meetings hosted both within your tenancy and those from external Teams meetings.