...
You can install the Linux version of CXD Connector directly onto your 3CX if you have root access to it, or you can install the Windows version to a separate computer, such as the one which your TIM Enterprise is installed on.
| Info |
|---|
CXD Connector is a read-only tool; it neither modifies your 3CX configuration nor directly accesses any 3CX internal databases. |
Installing CXD on your 3CX
...
| Code Block | ||||
|---|---|---|---|---|
| ||||
cd /var/tmp wget https://esd.tri-line.com/open/cxd/cxd_latest_amd64.deb apt install -f ./cxd_latest_amd64.deb |
This will start the text-based installer which consists of a series of prompts to enter the settings described below. To accept a prompt's Press ENTER at any prompt to accept the default value ( shown in square brackets) just press ENTER.
If you enter an invalid value (e.g. a port you've chosen is already in use) you will be prompted again until a valid value has been entered. To abort the installation, press
.Buttonmacro Label CTRL+C
| Prompt | Description |
|---|---|
| HTTP port [5080] | The default HTTP port to use for web requests. |
| HTTPS port [5443] | The default HTTPS port to use for web requests. |
| TCP port [7000] | The port used by CXD to emit live event data over a TCP connection. This is the port used when setting up the connection in TIM Enterprise. |
| Authentication Key [xxxxxxxxxxxxxxxx] | Choose a secret that you will also use when setting up the connection in TIM Enterprise. Press ENTER without typing a secret if you want to accept the random secret the installer has generated for you. |
| Register product [YES] | You can choose to register the installation with your Tri-Line account. If you select YES, you'll be asked for your Tri-Line Gateway login details: username (email) and password. If you skip this step, you can assign the installation to a customer account later in the Tri-Line Gateway using your web browser. |
...
To connect TIM Enterprise to your newly-installed CXD service, see Configure TIM Enterprise below.
Installing CXD on a separate Windows computer
...
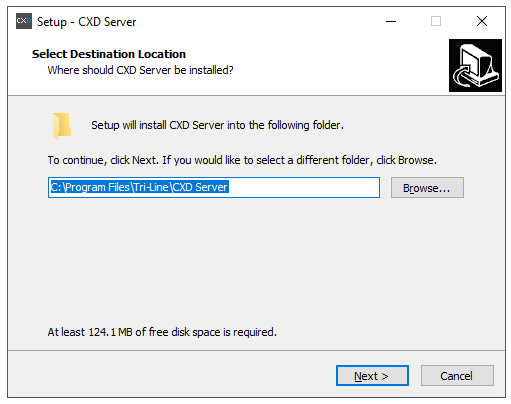
- Choose an installation location:
- On the “Select Components” section, leave all options selected as default and click
.Buttonmacro Label Next - On the “Ready to install” section, click on
.Buttonmacro Label Install - Once the installation is complete, the CXD configuration screen will be displayed:
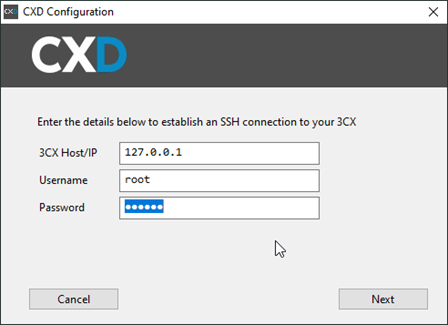
Enter the IP address of your 3CX PBX in the first field. The username and password fields should be those of a privileged SSH user on your 3CX.
When you've entered the details, click
to attempt the connection to the 3CX.Buttonmacro Label Next - After a successful connection has been established, the next screen allows you to set the ports that CXD will provide, as well as an API Secret:
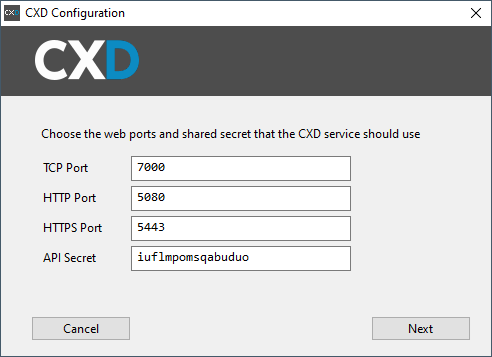
The API Secret is randomly generated, but you can choose your own.
When you've made a note of these details - they'll be needed when connecting TIM Enterprise to CXD - click
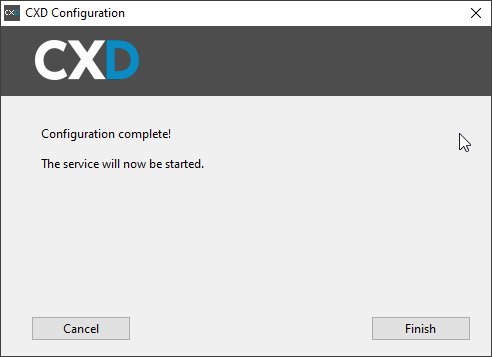
.Buttonmacro Label Next - When the wizard completes, it automatically starts the CXD Service:
| HTML |
|---|
<a id="ConnectusingCXD-configuringtimenterprise"></a> |
Configuring TIM Enterprise
...