...
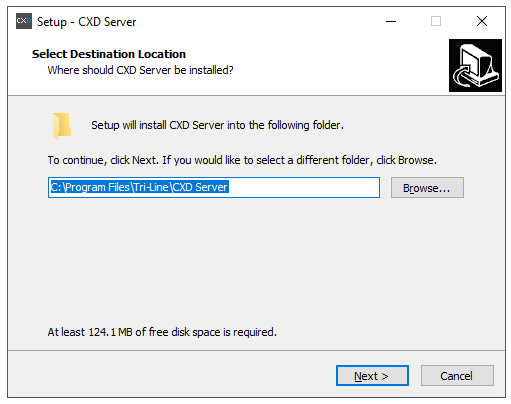
- Choose an installation location:
- On the “Select Components” section, leave all options selected as default and click .
- On the “Ready to install” section, click on .
- Once the installation is complete, the CXD configuration screen will be displayed:
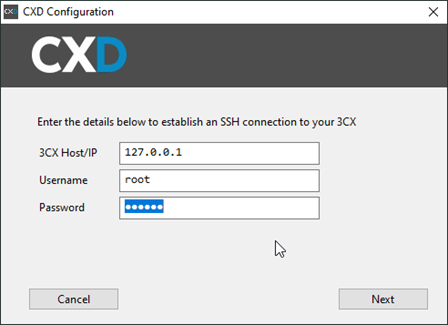
Enter the IP address of your 3CX PBX in the first field. The username and password fields should be those of a privileged SSH user on your 3CX.
When you've entered the details, click to attempt the connection to the 3CX.
- After a successful connection has been established, the next screen allows you to set the ports that CXD will provide, as well as an API Secret:
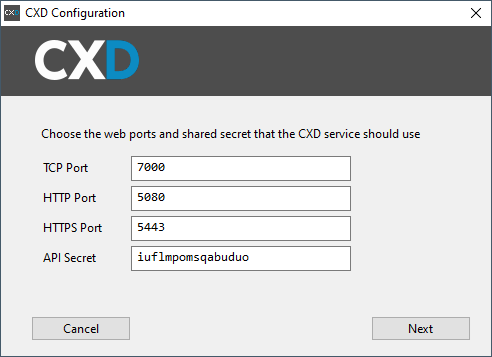
The API Secret is randomly generated, but you can choose your own.
When you've made a note of these details - they'll be needed when connecting TIM Enterprise to CXD - click .
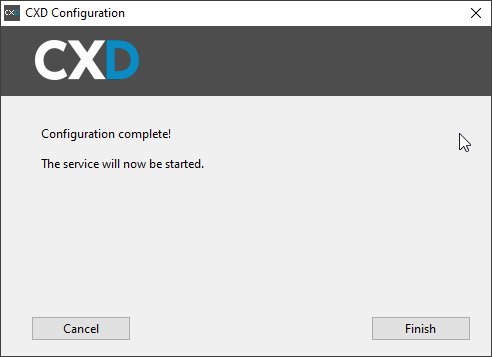
- When the wizard completes, it automatically starts the CXD Service:
...
| HTML |
|---|
<a id="configuring_tim_enterprise"></a> |
Configuring TIM Enterprise
...