...
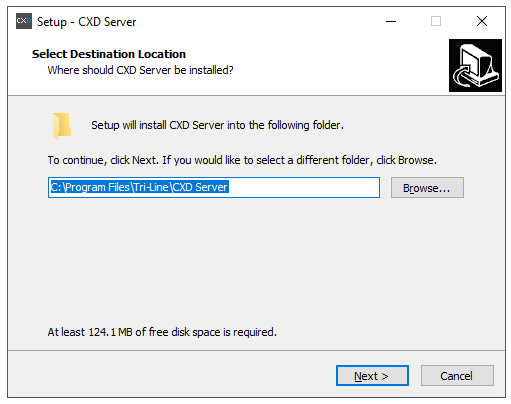
- Choose an installation location.:
- On the “Select Components” section, leave all options selected as default and click 'Next'click
.Buttonmacro Label Next - On the “ready Ready to install” section please , click on 'Install'. The Wizard will now attempt to install it.
.Buttonmacro Label Install - Once the installation is complete, the CXD configuration screen will pop up.There are three options that need to be configured. Enter the details as shown below:be displayed. Enter the following details:-
3CX Host/IP = Please enter the The IP address of the your 3CX PBX
Username = username used to connect to the 3CX
Password = password user to connect to the 3CXThe username and password fields should be those of a privileged SSH user on your 3CX.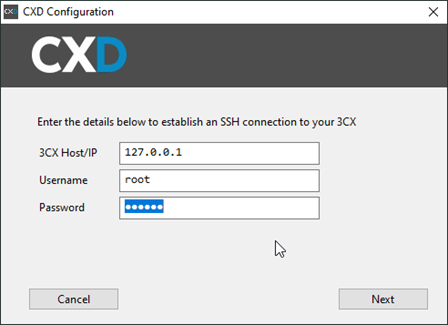
- Once this has been configured, please click 'Next'
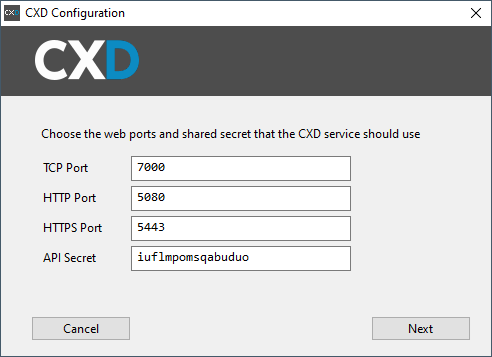
. If successful, CXD will attempt to establish a connection to the 3CX. Please note that an account that has SSH permission will be needed in order to connect successfully.Buttonmacro Label Next - You will be presented with the option to set web ports and an API Secret key that the CXD service will require when connecting with TIM Plus. Please make a note of this information as it will be needed later.
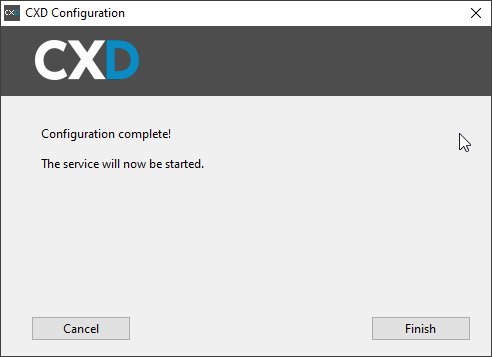
- Click 'Next' the Wizard will confirm that the configuration is complete, and the CXD service will be started.
...