Tri-Line provides comprehensive To get enhanced call logging , analytics, and reporting for 3CX. For self-hosted systems, our special CXD connector collects live events from your 3CX, enabling real-time monitoring of call status and queues as well as advanced call logging.
This gets around the restrictions imposed when using the native CDR output through the regular Active or Listening connection on 3CX.
When using CXD, there is no need to configure the SMDR (Station Message Detail Recording) output on the 3CX phone system as CXD operates independently and uses the live event data, simplifying the setup process.
Pre-installation requirements
You need to have the information below and at least 124.1 MB of disk space in order to complete the installation of CXD:
- IP address of the 3CX phone system
- Primary/route account username (SSH access)
- Password for Primary account
Once, you have this, our support team will be able to remotely configure CXD and set up event logging for youdata, install our CXD Connector tool to act as a relay between your TIM Enterprise product and your 3CX PBX.
CXD Connector circumvents the built-in SMDR functionality of the 3CX, so there's no need to configure any SMDR settings.
You can install the Linux version of CXD Connector directly onto your 3CX if you have root access to it, or you can install the Windows version to a separate computer, such as the one which your TIM Enterprise is installed on.
CXD Connector is a read-only tool. It neither modifies your 3CX configuration nor directly accesses any 3CX internal databases.
Installing CXD on your 3CX
Connect using SSH to your 3CX using a privileged user account, then enter the following commands:
| Code Block | ||||
|---|---|---|---|---|
| ||||
cd /var/tmp
wget https://esd.tri-line.com/open/cxd/cxd_latest_amd64.deb
apt install -f ./cxd_latest_amd64.deb
|
This will start the text-based installer which consists of a series of prompts to enter the settings described below. To accept a prompt's default value (shown in square brackets) just press ENTER.
If you enter an invalid value (e.g. a port is already in use) you will be prompted again until a valid value has been entered. To abort the installation, press CTRL+C.
| Prompt | Description |
|---|---|
| HTTP port [5080] | The default HTTP port to use for web requests. |
| HTTPS port [5443] | The default HTTPS port to use for web requests. |
| TCP port [7000] | The port used by CXD to emit live event data over a TCP connection. This is the port used when setting up the connection in TIM Enterprise. |
| Authentication Key [xxxxxxxxxxxxxxxx] | Choose a secret that you will also use when setting up the connection in TIM Enterprise. Press ENTER without typing a secret if you want to accept the random secret the installer has generated for you. |
| Register product [YES] | You can choose to register the installation with your Tri-Line account. If you select YES, you'll be asked for your Tri-Line Gateway login details: username (email) and password. If you skip this step, you can assign the installation to a customer account later in the Tri-Line Gateway using your web browser. |
After completing the above prompts, the installer automatically enrols with the licensing service and will start CXD automatically.
The final step is to connect TIM Enterprise to your newly-installed CXD service. See Configure TIM Enterprise below.
Installing CXD on on a separate Windows computer
To get a copy of the Windows version of the CXD Connector, submit a support ticket through our online Gateway or send an email to [email protected].
Once you have the installation package, before you begin installation, please check you have the following information to hand:-
- IP address of your 3CX PBX
- A username and password of a privileged account (e.g. root) that the installer can use to SSH in to your 3CX.
NOTE: CXD does not alter the configuration of the phone system itself; it only uses the information to establish the connection to collect live events.
Getting CXD
Please submit a support ticket through our online Gateway or send an email to [email protected] to request a copy of the 3CX CXD Server. To guarantee that the 3CX live events are appropriately captured and linked with TIM Enterprise, the support team will need to help with the CXD server installation.We offer versions for Linux and Windows . The version needed will be determined by where the 3CX is installed. If you're installing on your 3CX server, you must install the Linux version; if you're installing on a TIM server, you must install the Windows version.NOTE: 3CX CXD server is a 64-Bit application.version of the CXD Connector.
Installing CXD
- Once you have obtained your copy of CXD, you're ready to install.
- Click on the Executable and UAC will pop up. Please click yes to accept this.
- The Wizard will now ask you where to install the CXD Server, please change this as per your requirements.

- On the “Select Components” section please leave everything as default and click 'Next'.
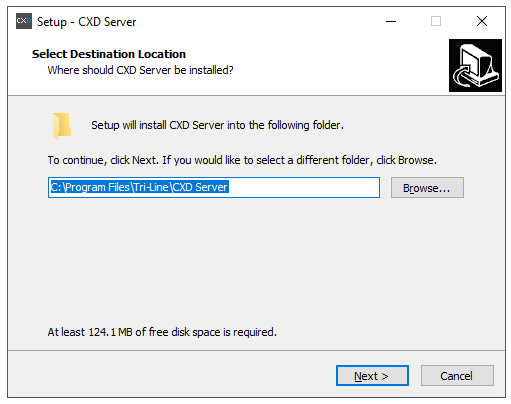
- On the “ready to install” section please click on 'Install'. The Wizard will now attempt to install it.
- Once the installation is complete, the CXD configuration screen will pop up.
- There are three options that need to be configured. Enter the details as shown below:
3CX Host/IP = Please enter the IP address of the 3CX PBX
Username = username used to connect to the 3CX
Password = password user to connect to the 3CX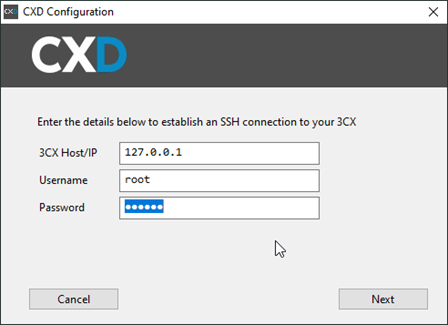
- Once this has been configured, please click 'Next'. If successful, CXD will attempt to establish a connection to the 3CX. Please note that an account that has SSH permission will be needed in order to connect successfully.
- You will be presented with the option to set web ports and an API Secret key that the CXD service will require when connecting with TIM Plus. Please make a note of this information as it will be needed later.
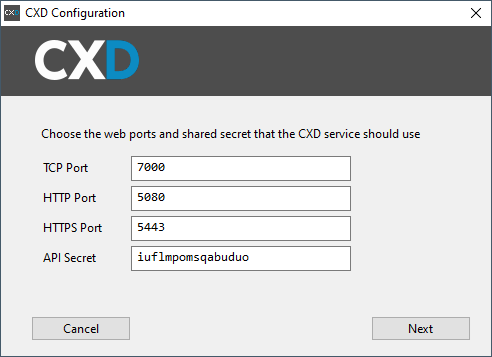
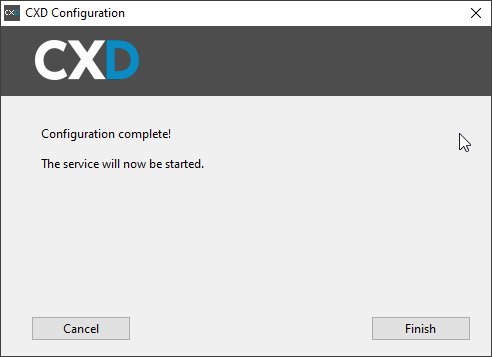
- Click 'Next' the Wizard will confirm that the configuration is complete, and the CXD service will be started.
...