For self-hosted systems, our special CXD connector collects live events from your 3CX, enabling real-time monitoring of call status and queues as well as advanced call logging.
This gets around the restrictions imposed when using the native CDR output through the regular Active or Listening connection on 3CX.
When using CXD, there is no need to configure the SMDR (Station Message Detail Recording) output on the 3CX phone system as CXD operates independently and uses the live event data, simplifying the setup process.
Pre-installation requirements
You need to have the information below and at least 2.5 MB of disk space in order to complete the installation of CXD:
- IP address of the 3CX phone system
- Primary/route account username (SSH access)
- Password for Primary account
Once, you have this, our support team will be able to remotely configure CXD and set up event logging for you.
NOTE: CXD does not alter the configuration of the phone system itself; it only uses the information to establish the connection to collect live events.
Getting CXD
Please submit a support ticket through our online Gateway or send an email to [email protected] to request a copy of the 3CX CXD Server. To guarantee that the 3CX live events are appropriately captured and linked with TIM Plus, the support team will need to help with the CXD server installation.
We offer versions for Linux and Windows. The version needed will be determined by where the 3CX is installed. If you're installing on your 3CX server, you must install the Linux version; if you're installing on a TIM server, you must install the Windows version.
NOTE: 3CX CXD server is a 64-Bit application
Installing CXD
- Once you have obtained your copy of CXD, you're ready to install.
Click on the Executable and UAC will pop up. Please click yes to accept this.
The Wizard will now ask you where to install the CXD Server, please change this as per your requirements.
- On the “Select Components” section please leave everything as default and click 'Next'.

- On the “ready to install” section please click on 'Install'. The Wizard will now attempt to install it.
- Once the installation is complete, the CXD configuration screen will pop up.
- There are three options that need to be configured. Enter the details as shown below:
3CX Host/IP = Please enter the IP address of the 3CX PBX
Username = username used to connect to the 3CX
Password = password user to connect to the 3CX
- Once this has been configured, please click 'Next'. If successful, CXD will attempt to establish a connection to the 3CX. Please note that an account that has SSH permission will be needed in order to connect successfully.
- You will be presented with the option to set web ports and an API Secret key that the CXD service will require when connecting with TIM Plus. Please make a note of this information as it will be needed later.

- Click 'Next' the Wizard will confirm that the configuration is complete, and the CXD service will be started.

Configuring TIM
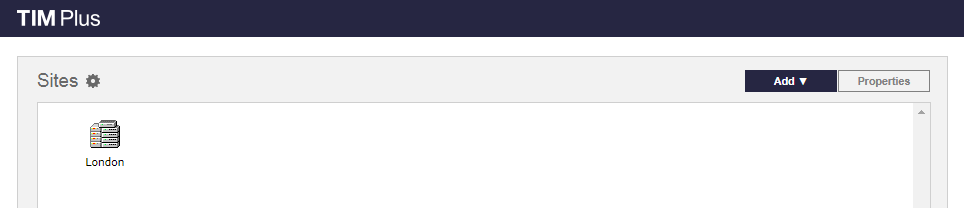
- To add a site, click on the 'Directory' tab.

- Click on the 'Add' dropdown in the 'Sites' panel as shown below:
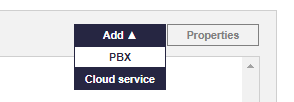
- Then select 'PBX' as shown below:
- A ‘Site properties’ panel will pop up. Select the 'PBX' tab and fill in as follows:
Name: Name of Site or Location where the PBX is located e.g. London.
PBX: Select ‘3CX CXD’ from the drop-down list.
Connection Method: Select ‘Actively connect to PBX’ from the drop-down list.
Host: The IP address of the machine where the CXD server was installed.
Password: This is the ‘API Secret’ created earlier.
Connection Script: Select '3CX CXD' from the drop-down list.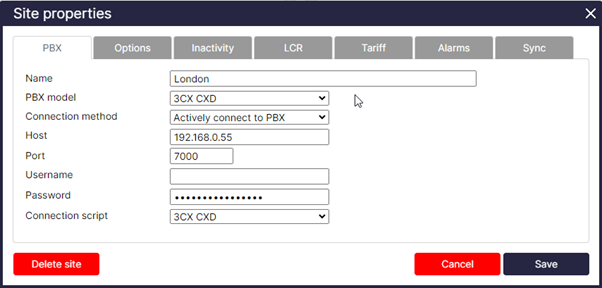
- An additional benefit of using CXD as the connection method is that TIM Plus can sync with the 3CX Server. A sync will allow you to pull a list of users and devices from the system. This allows you to configure and set up the directory much faster.
- On the “Site Properties” Panel click on the 'Sync' tab.
- Enter the following information:
Host: IP Address of the machine hosting the CXD server and the HTTP port set earlier when configuring the CXD server (Default 7000).
Password: Click Set, this is the ‘API Secret’ created earlier.
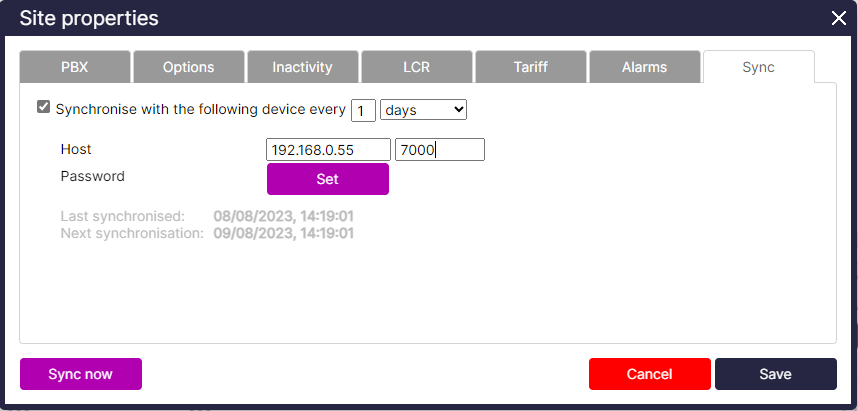
- Click 'Save' and the users will sync.
- Data should now appear within the 'Call view' Tab a test call can be made to confirm this.